5,347 views
 First look at Exchange 2010 Beta1 High Availability using DAG
Lab config :
- 1 x Windows 2008 server Standard Edition, 64bit : DC + HUB/CAS Server role : dionysus – 192.168.0.21
- 2 x Windows 2008 servers Enterprise Edition, 64bit : Mailbox server roles : exch2010mb1 (192.168.0.22) and exch2010mb2 (192.168.0.23)
- 2 Databases will be created (one on each mailbox server, created automatically when the Mailbox role is installed)
- One DAG will be created
- Both mailbox servers will be added into a DAG for High Availability.
A lot of changes have been made to Exchange 2010 with regards to High Availability. SCC is no longer supported in 2010. SCR and CCR are combined into a “Database Availability Group”. Per DAG, you can combine up to 16 Exchange servers (which can span Active Directory sites) that will provide automatic database-level recovery from failures that affect individual databases. And you no longer need to deploy a Microsoft Cluster to achieve high availability. (The Failover Clustering Feature needs to be installed, but you don’t need to configure it yourself). Furthermore, the Microsoft documentation states :
“Exchange 2010 has been re-engineered around the concept of continuous availability, in which the architecture has changed so that automatic failover protection is now provided at the individual mailbox database level instead of at the server level. In Exchange 2010, this is known as database mobility. As a result of this and other database cache architectural changes, failover actions now complete much faster than in previous versions of Exchange. For example, failover of a clustered mailbox server in a CCR environment running Exchange 2007 with Service Pack 1 completes in about 2 minutes. By comparison, failover of a mailbox database in an Exchange 2010 environment completes in 30 seconds (measured from the time when the failure is detected to when a database copy is mounted, assuming the copy is healthy and up-to-date with log replay). The combination of database-level failovers and significant faster failover times dramatically improves an organization’s overall uptime.”
Storage Groups are gone in Exchange 2010. All that is left are databases. Makes sense, because Microsoft always recommended to put only one database in a storage group, so the concept of storage groups became somewhat redundant. The entire Exchange 2010 set up can now be made highly available. In fact, you can put everything on just two servers and make it high available (whereas in 2007, the HUB/CAS role could not be clustered, so you needed dedicated hardware for the mailbox servers and dedicated hardware for the HUB/CAS servers). In 2010, this is no longer true. I could have installed my testlab on 2 servers only. For more info, check these pages : http://blogs.technet.com/ewan/archive/2009/04/15/exchange-2010-beta-high-availability-strategies.aspx High Availability and Site Resilience Database Availability Group (DAG) -Exchange 2010 You can find more information about Exchange 2010 on Technet at http://technet.microsoft.com/en-us/library/bb124558(EXCHG.140).aspx
HUB/CAS – Installation Procedure
DC : default install, has AD Directory Services installed (and basics configured such as subnet under sites&services, DNS etc) + IIS/HTTP Activation/etc (see list of prerequisites below). Remark : if you want to disable IPv6 on Windows 2008, make sure to do it properly, or you will see event log entries that look like this :
Source: MSExchange ADAccess Event ID: 2114 Task Category: Topology Level: Error Description: Process MSEXCHANGEADTOPOLOGYSERVICE.EXE (PID=952). Topology discovery failed, error 0x80040a02 (DSC_E_NO_SUITABLE_CDC). Look up the Lightweight Directory Access Protocol (LDAP) error code specified in the event description. To do this, use Microsoft Knowledge Base article 218185, “Microsoft LDAP Error Codes.” Use the information in that article to learn more about the cause and resolution to this error. Use the Ping or PathPing command-line tools to test network connectivity to local domain controllers.
Check out http://blogs.technet.com/sbs/archive/2008/10/24/issues-after-disabling-ipv6-on-your-nic-on-sbs-2008.aspx and use the registry edit described in that document in order to properly disable IPv6 (and don’t forget to comment out the hosts file entry “localhost ::1”) On the DC (machine that will become HUB/CAS – I know, bad idea to do this in real life, but hey – it’s a test environment) : I’ve logged in with enterprise/schema admin permissions Prerequisites :
- IIS (don’t forget to enable IIS7 .Net Extensibility, the various Authentication options under “Security” and to enable “Dynamic Content Compression”)
Also, enable “IIS6 Metabase Compatibility” and “IIS6 Management Console”
- HTTP Activation Feature (under .Net Framework 3.0 Features\WCF Activation)
- Windows Process Activation Service Process Model (automatically installed while installing IIS)
- MS KB 951725 : http://support.microsoft.com/kb/951725 (Needs a reboot)
- MS KB 950888 : http://support.microsoft.com/?kbid=950888 (Needs a reboot)
- .NET Framework 3.5 (http://go.microsoft.com/fwlink/?LinkId=110461) – this one needs access to the internet, or use this link : dotnetfx35.exe to download the full package.
- WinRM 2.0 (CTP3) Remote Management 2.0 : http://go.microsoft.com/fwlink/?LinkId=135126 (for Windows 2008 64bit : WinRM CTP3 on Vista and WS08 (x64)) – (Needs a reboot)
- Powershell v2 : http://go.microsoft.com/fwlink/?LinkId=135123
A quick note on requirements satisfaction and automated installs: The following website ( http://www.exchangemaster.net/index.php?option=com_content&task=view&id=98&Itemid=57 ) shows a quick technique and script to automate the installation of the requirements Anyways, When all requirements are met : Launch setup.exe and choose “Install Microsoft Exchange” 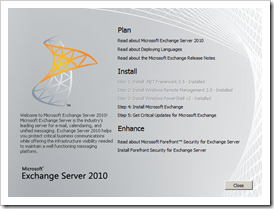
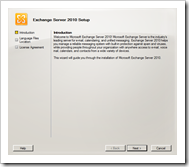
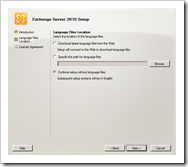 Continue setup without additional language files
  Accept the warning and click next Accept the License Agreement
 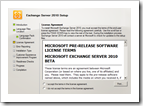 Error Reporting : choose Yes or No and click next Installation Type : Choose custom
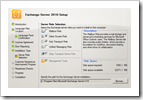
 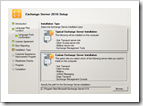 Select the Hub Transport, Client Access Roles (Exchange Management Console will be selected automatically). Disk space required for these 2 roles : 1094Mb
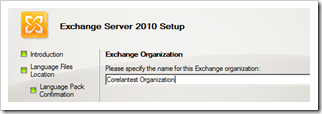
  Enter Exchange Organization name
  Choose whether you wan to join the Exchange Customer Experience Improvement Program Readiness check will now run – wait until this process has completed.
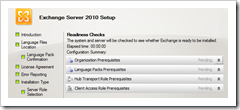
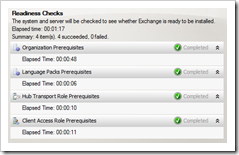 Review outcome of the Readiness Check process (and perform all requested actions before continuing) Click install to start the installation
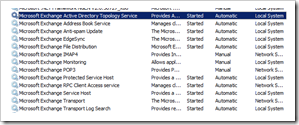
 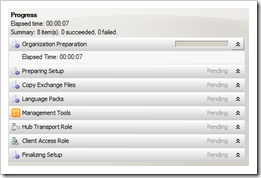 The first server is now set up. Close the installation program, reboot and verify that all relevant MS Exchange services are started
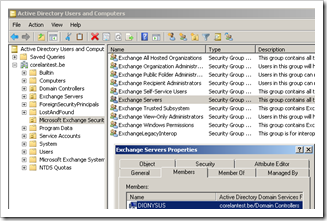
  Open AD U&C and verify that the server is added to the “Exchange Servers” group in the MS Exchange Security OU
  The Exchange Management Console looks very similar to the one in Exchange 2007 :
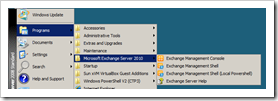
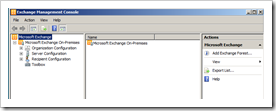 At this point, under “Server Configuration” – “Client Access” or “Hub transport”, you should be able to see the first server.
 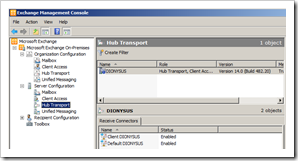 When you look at the Management Console, you can see an additional (top) level node called “Microsoft Exchange On-Premises” When you select this top level node, you get the following overview :
 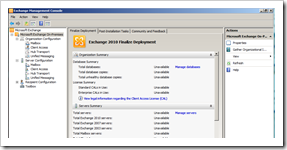 You can run the “Gather Organizational Information” task from the Actions pane to enumerate server/user information and populate the summary screens :
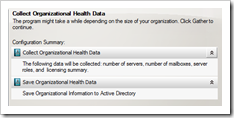
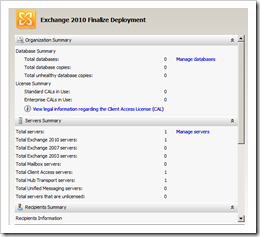 One way of validating that the CAS server works is by trying to connect to OWA. Although you will get a certificate warning and there are no mailbox servers yet, you should at least get a password prompt when entering https://fqdn.of.server/owa
 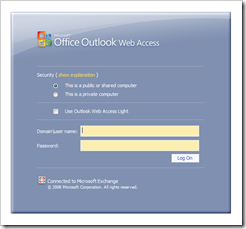 Nice, but not very useful so far, we don’t have a mailbox server or mailboxes yet :-)
Mailbox Server – Installation Procedure
Again, make sure all requirements for installing a Exchange 2010 Mailbox server have been verified :
- .Net Framework 3.5
- Windows Remote Management 2.0
- Windows Powershell v2
- IIS (same requirements as hub/cas role)
- KB 951725
- Failover Clustering Feature (if you want to use the DAG functionality)
- Office System Converter : Microsoft Filter Pack (http://go.microsoft.com/fwlink/?LinkId=123380)
Log on with Exchange administrator permissions and local admin permissions, and launch the Exchange server installation. Select Custom installation and select the Mailbox Role 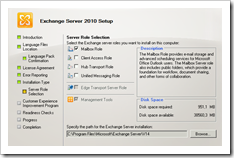 Choose whether you want to allow Outlook 2003 and older clients to connect or not (so whether you want to create a public folder or not) Review the Readiness Check results and start the installation
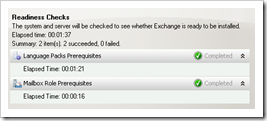
Note : if you are trying to install the Exchange 2010 Beta 1 mailbox role on a cluster node, you will get the following error in the output of the Readiness Check : “The cluster service is installed on this computer. The machine must not be a member of a cluster prior to installing Exchange” As explained at the top of this document, you simply don’t need clustering for high availability in Exchange 2010.
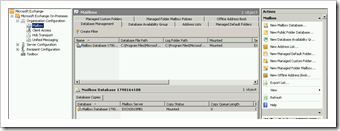
Let’s continue with the setup. 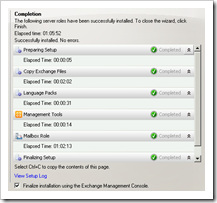 When enabled, Exchange Management Console will open after pressing Finish. Verify that the new mailbox server is listed.
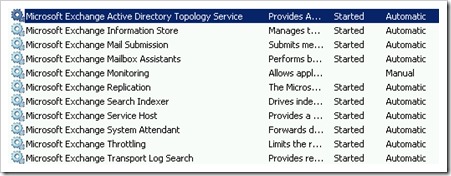
  Verify that all required Exchange services (for Mailbox servers) have been installed and are started :
  Create a mailbox and verify that you can access the mailbox using OWA :
 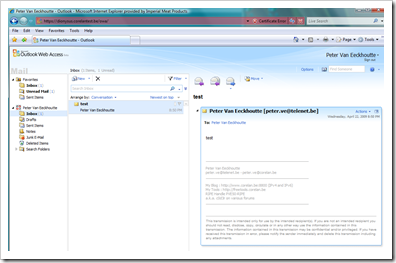 Looks fine. Now it’s time to add some redundancy/high availability to the mailbox server by creating a DAG (see Managing Database Availability Groups). A DAG uses a subset of Microsoft Clustering services / Failover Clustering (on Windows 2008) and requires a File Share Witness (just like a cluster would). Before creating the DAG, create a folder (on the CAS/HUB server, share the folder and make sure the mailbox servers can access the share). In my lab, I have created share \\dionysus\FileShareWitness. (Or alternatively, the folder and share the folder on the File Share Witness target server will be created automatically if they don’t not exist yet, but only when the second node is added to the DAG. (So don’t be surprised that the folder and share are not created if only one server is added to the DAG). In fact, the File Share Witness is only used when you have an even number of servers in the DAG. If you have an uneven number of servers, the FSW is not used. First, make sure the Failover Clustering Feature is installed on the server that you want to add to the DAG (It only needs to be installed, not configured. If a failover cluster was configured when you installed Exchange, you would not have been able to install the Mailbox Role in the first place) In EMC, under “Organization Configuration” – “Mailbox”, click “New Database Availability Group”
 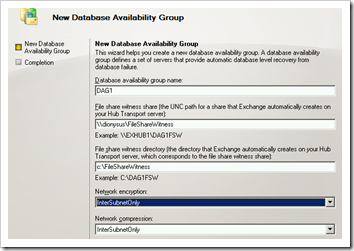 Or in Powershell :
[PS] C:\>New-DatabaseAvailabilityGroup -Name 'DAG1'
-FileShareWitnessShare '\\dionysus\FileShareWitness'
-FileShareWitnessDirectory 'c:\FileShareWitness' Name Member Servers Operational Servers ---- -------------- ------------------- DAG1 {} [PS] C:\>Set-DatabaseAvailabilityGroup -id 'DAG1'
-NetworkEncryption 'InterSubnetOnly'
-NetworkCompression 'InterSubnetOnly'
WARNING: The command completed successfully but no settings of 'DAG1' have been modified. [PS] C:\>
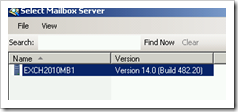
A quick note on Powershell : there are some known issues with the Beta1 version and remote powershell, so if something doesn’t work, then try the “Local Powershell” version. Verify that you can access the FileShareWitness share from all mailbox servers that need to be joined to the DAG ‘Cluster’. The servers must have read/write access. Add the first server into the DAG. You can add a server using the GUI or via Powershell. If you want to use the GUI (not advised – see below), select the newly created DAG, right-click and choose “Manage Database Availability Group Membership” 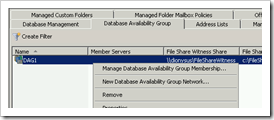 Add the mailbox server(s) into the DAG
  Powershell :
Add-DatabaseAvailabilityGroupServer -Identity 'DAG1' -MailboxServer 'EXCH2010MB1' -DatabaseAvailabilityGroupIpAddress 192.168.0.24
(You only need to specify the DatabaseAvailabilityGroupIpAddress when adding the first server to the DAG. If you don’t specify this parameter, a IPv4 address will be leased from DHCP). Keep in mind that you cannot specify the IP address when using the GUI, so it’s advised to use powershell when adding the first server to the DAG. This parameter is not required when adding more servers to the DAG.) 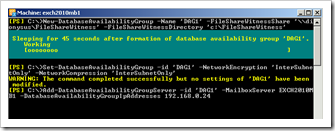 After adding the first server into to the DAG, a computer object will be created. (So you must have permissions to add a computer object in AD). Alternatively, you can create a disabled computer object in AD prior to creating the DAG.
  Review the DAG network(s) and verify that the DAG replication (log shipping and seeding) will occur over the correct network interfaces/subnets (if you have multiple NIC’s). You can rename the networks if that makes more sense for you. The DAG network is also used by clients to connect to mailbox databases in the DAG. If replication is not enabled, the network can only be used by clients. My mailbox servers have 2 nic’s : one in the network range accessible for clients (192.168.0.0/24) and one in a separate back-end network range. The first network can be used for clients and for replication, the back-end will only be used for replication :
[PS] C:\>Get-DatabaseAvailabilityGroupNetwork | FL RunspaceId : 61102664-677b-463e-88dc-0d41c8442f18 Name : DAGNetwork01 Description : Subnets : {{192.168.0.0/24,Up}} Interfaces : {{exch2010mb1,Up,192.168.0.22}} MapiAccessEnabled : True ReplicationEnabled : True IgnoreNetwork : False Identity : DAG1\DAGNetwork01 IsValid : True RunspaceId : 61102664-677b-463e-88dc-0d41c8442f18 Name : DAGNetwork02 Description : Subnets : {{1.1.1.0/24,Up}} Interfaces : {{exch2010mb1,Up,1.1.1.10}} MapiAccessEnabled : False ReplicationEnabled : True IgnoreNetwork : False Identity : DAG1\DAGNetwork02 IsValid : True
Take a look at the database configuration on the mailbox server after adding it into the DAG. Initially, the database master was set to exch2010mb1 and the master type was set to “Server”, but now the master is set to “DAG1” and the Master Type is set to “Database Availability Group”
[PS] C:\>Get-MailboxDatabase -server EXCH2010MB1 | FL RunspaceId : 7355ebc1-f541-40e1-9b66-ebe3a864dda2 StandbyMachines : {} JournalRecipient : MailboxRetention : 30.00:00:00 OfflineAddressBook : OriginalDatabase : PublicFolderDatabase : ProhibitSendReceiveQuota : 2.3 GB (2,469,396,480 bytes) Recovery : False ProhibitSendQuota : 2 GB (2,147,483,648 bytes) IndexEnabled : True IsExcludedFromProvisioning : False IsSuspendedFromProvisioning : False ReplicationType : None AdministrativeGroup : Exchange Administrative Group (FYDIBOHF23SPDLT) AllowFileRestore : False BackgroundDatabaseMaintenance : True BackupInProgress : CopyEdbFilePath : DatabaseCreated : True Description : EdbFilePath : C:\Program Files\Microsoft\Exchange Server\V1 4\Mailbox\Mailbox Database 1790164108\Mailbox Database 1790164108.edb ExchangeLegacyDN : /o=Corelantest Organization/ou=Exchange Admin istrative Group (FYDIBOHF23SPDLT)/cn=Configur ation/cn=Servers/cn=DIONYSUS/cn=Microsoft Pri vate MDB HasLocalCopy : False DatabaseCopies : {Mailbox Database 1790164108} Servers : {EXCH2010MB1} ReplayLagTimes : {00:00:00} TruncationLagTimes : {00:00:00} RpcClientAccessServer : dionysus.corelantest.be MountedOnServer : DeletedItemRetention : 14.00:00:00 SnapshotLastFullBackup : SnapshotLastIncrementalBackup : SnapshotLastDifferentialBackup : SnapshotLastCopyBackup : LastFullBackup : LastIncrementalBackup : LastDifferentialBackup : LastCopyBackup : DatabaseSize : DatabaseAvailableSpace : MaintenanceSchedule : {zo.1:00-zo.5:00, ma.1:00-ma.5:00, di.1:00-di .5:00, wo.1:00-wo.5:00, do.1:00-do.5:00, vr.1 :00-vr.5:00, za.1:00-za.5:00} MountAtStartup : True Mounted : Organization : Corelantest Organization QuotaNotificationSchedule : {zo.1:00-zo.1:15, ma.1:00-ma.1:15, di.1:00-di .1:15, wo.1:00-wo.1:15, do.1:00-do.1:15, vr.1 :00-vr.1:15, za.1:00-za.1:15} RetainDeletedItemsUntilBackup : False Server : EXCH2010MB1 MasterServerOrAvailabilityGroup : DAG1 MasterType : DatabaseAvailabilityGroup ServerName : EXCH2010MB1 IssueWarningQuota : 1.899 GB (2,039,480,320 bytes) EventHistoryRetentionPeriod : 7.00:00:00 Name : Mailbox Database 1790164108 LogFolderPath : C:\Program Files\Microsoft\Exchange Server\V1 4\Mailbox\Mailbox Database 1790164108 CircularLoggingEnabled : False CopyLogFolderPath : LogFilePrefix : E00 LogFileSize : 1024 AdminDisplayName : Mailbox Database 1790164108 ExchangeVersion : 0.10 (14.0.100.0) DistinguishedName : CN=Mailbox Database 1790164108,CN=Databases,C N=Exchange Administrative Group (FYDIBOHF23SP DLT),CN=Administrative Groups,CN=Corelantest Organization,CN=Microsoft Exchange,CN=Service s,CN=Configuration,DC=corelantest,DC=be Identity : Mailbox Database 1790164108 Guid : 8360edd9-4cec-49ab-9e14-04b1fcd3f8ac ObjectCategory : corelantest.be/Configuration/Schema/ms-Exch-P rivate-MDB ObjectClass : {top, msExchMDB, msExchPrivateMDB} WhenChanged : 22/04/2009 15:00:30 WhenCreated : 22/04/2009 14:17:14 OrganizationId : OriginatingServer : dionysus.corelantest.be IsValid : True
Install the second mailbox server. Verify that all required services are running on the second mailbox server. Especially the Microsoft Exchange Replication Service and the Cluster service are important for the DAG process (and for adding the second mailbox server to the DAG) Add the second mailbox server to the DAG. From this point forward, database level recovery for the database will be enabled automatically.
[PS] C:\>Get-DatabaseAvailabilityGroup -id "DAG1" | FL Name : DAG1 Servers : {EXCH2010MB2, EXCH2010MB1} FileShareWitnessShare : \\dionysus\FileShareWitness FileShareWitnessDirectory : c:\FileShareWitness AlternateFileShareWitnessShare : AlternateFileShareWitnessDirectory : NetworkCompression : InterSubnetOnly NetworkEncryption : InterSubnetOnly DatacenterActivationMode : Off StoppedMailboxServers : {} StartedMailboxServers : {} OperationalServers : ControllingActiveManager : ReplicationPort : 0 NetworkNames : {} AdminDisplayName : ExchangeVersion : 0.10 (14.0.100.0) DistinguishedName : CN=DAG1,CN=Database Availability Groups,CN =Exchange Administrative Group (FYDIBOHF23 SPDLT),CN=Administrative Groups,CN=Corelan test Organization,CN=Microsoft Exchange,CN =Services,CN=Configuration,DC=corelantest, DC=be Identity : DAG1 Guid : ffc0918d-b674-4bad-b44d-39059493b178 ObjectCategory : corelantest.be/Configuration/Schema/ms-Exc h-MDB-Availability-Group ObjectClass : {top, msExchMDBAvailabilityGroup} WhenChanged : 23/04/2009 22:29:23 WhenCreated : 23/04/2009 22:29:23 OrganizationId : OriginatingServer : dionysus.corelantest.be IsValid : True
Now create database copies. Open “Database Management” (Organization Configuration – Mailbox), select the Mailbox database you want to make highly-available, right-click and choose “Add Mailbox Database Copy” 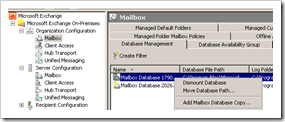 Select the server that needs to get a copy of the mailbox database, set the replay and truncation lag times and click “Add”
 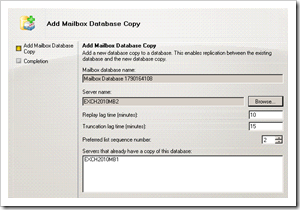 Via Powershell :
Add-MailboxDatabaseCopy -Identity 'Mailbox Database 1790164108' -MailboxServer 'EXCH2010MB2' -ReplayLagTime '00:10:00' -TruncationLagTime '00:15:00' -ActivationPreference '2'
The –MailBoxServer parameter must refer to the target Mailbox server. Verify that the mailbox is being replicated :
[PS] C:\>Get-MailboxDatabase -id "Mailbox Database 1790164108" | FL Servers, ReplicationType Servers : {EXCH2010MB1, EXCH2010MB2} ReplicationType : Remote
Wait until the copy has completed
[PS] C:\>Get-MailboxDatabaseCopyStatus -id "Mailbox Database 1790164108" Name CopyStatus CopyQueueLen ReplayQueueL LastInspect gth ength edLogTime ---- ---------- ------------ ------------ ----------- Mailbox Database 17901641 Mounted 0 0 08\EXCH2010MB1 Mailbox Database 17901641 Healthy 0 1 23/04/2009 08\EXCH2010MB2 23:22:29
and then test failover My test mailbox is currently hosted on mailbox server EXCH2010MB1. Bring node exch2010mb1 down. (For MSCS/Failover Clustering lovers, you can still see the cluster status using the Failover Cluster Management console) 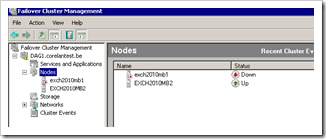 As soon as the node goes down, the database will be mounted on the second server :
  and after a short while, the copy status is changed from Healthy over Initializing to ServiceDown
  The mailbox database is now hosted on EXCH2010MB2
  See if you can still connect to the mailbox :
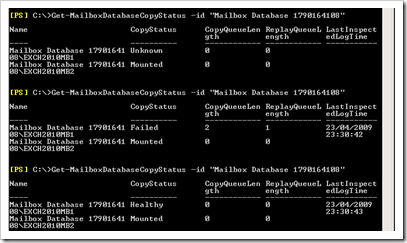
 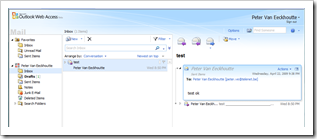 Bring the first node up again and verify that data gets synced again and the failback completes properly (and the mailbox database is hosted on exch2010mb1 again) First, the CopyStatus on the previously failed node goes to unknown, then – while it’s copying & replaying log files – it goes to Failed, and finally it goes back to healthy
  The current mailbox server is now still set to exch2010mb2, which is not a problem. If you want to make exch2010mb1 the active node again for this mailbox database, use the following cmdlet : move-activemailboxdatabase –id “Mailbox Database 1790164108” –ActivateOnServer EXCH2010MB1
 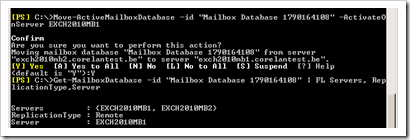 The mailboxdatabasecopystatus reflects the new situation :
© 2009 – 2021, Peter Van Eeckhoutte (corelanc0d3r). All rights reserved.


