6,661 views
 Connect to Openfiler SAN using CHAP authentication (MS iSCSI Initiator)
Assuming that you’ve made yourself familiar with the procedure on how to allow/deny access to a specific lun based upon IP addresses, then you might have wondered if you can secure access to a LUN even more. After all, spoofing an IP address is not that hard to do, and if IP based ACL is the only security, then you’ll have a false sense of security. So, in case you want to secure your Openfiler based SAN just a little more, this is what you can do. Before explaining the procedure, I’d like to add that it is very very important to exactly follow the sequence that is shown below.
On the openfiler management website, go to the volume that you want to secure. Edit the LUn and go to the iSCSI CHAP Authentiation section for the currently selected volume. Verify that there is no CHAP username/password filled out yet. MS iSCSI Initiator Discovery and Openfiler CHAP authentication don’t work well together, so you’ll have to add the Target in MS iSCSI Initiator without password, then set the password on the filer, refresh the targets and log on using the username/password
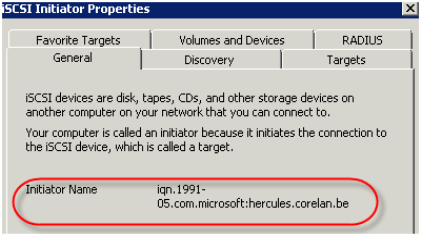
First, note the Initiator Name
Go to the “Discovery” tabsheet and add a Target Portal. Don’t specify a CHAP username and password. Next, go to the “Targets” tabsheet. You should see the lun that is hosted on the filer now (status set to inactive)
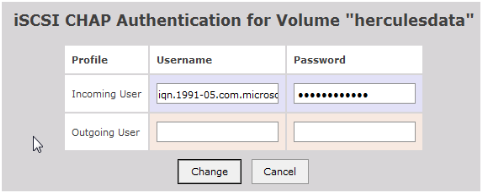
Go to the Openfiler administrator, edit the volume, and go to the iSCSI Chap authentication section. Fill out the username and password next to “IncomingUser”
Make sure to use the Initiator name as username, and choose a 12 character password. I’ve noticed that Microsoft isn’t too happy about strange characters, so you’ll need to play with the passwords a bit.
Click ‘change’
Next, open a ssh shell on your filer and run
[root@san01 ~]# service iscsi-target restart
Stopping iSCSI target service: [ OK ]
Starting iSCSI target service: [ OK ]
[root@san01 ~]#
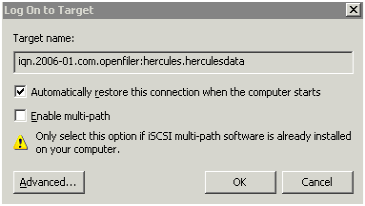
Go back to the Microsoft iSCSI Initiator client, “Targets” tabsheet, select the Target and click “Log on”.

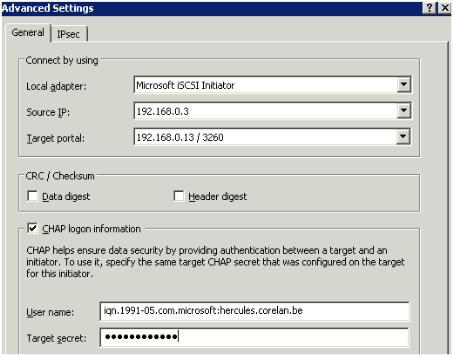
Next, click “Advanced”
Set the adapter & IP properties, enable “CHAP logon information” and fill out the user name (leave as is, the Initiator name will be prompted) and password.

Click “OK” to save, click “OK” to close the “Log On to Target” dialog box.
Look at the status of the Target volume. It should now say “Connected”.
© 2007 – 2021, Peter Van Eeckhoutte (corelanc0d3r). All rights reserved.


