11,157 views
 Using Active Directory and IAS based Radius for Netscreen WebAuth authentication
As most of the bigger players in the firewall market, Juniper/Netscreen SreenOS based firewalls allow you to use/enforce/require authentication for various reasons :
- Admin login
- Client VPN
- Authentication to open a specific rule on the firewall
In a default configuration, ScreenOS uses a local user account database for all types of authentication listed above. In some real life environments, it’s not uncommon to see that administrators would want to use their existing Active Directory infrastructure as a back-end authentication database, and use additional features such as Active Directory group membership to be more specific in terms of allowing access. ScreenOS offers 2 ways of accomplishing this : using ldap or using radius. In fact, if external authentication is allowed on appliances, in most cases, this happens thru ldap and/or radius. But not all implementations are the same and/or will offer similar functionality. For example : Nortel Contivity ldap allows you to specify an Active Directory bind account. This allows the device to read AD, read object attributes, and use those attributes to assign fixed IP addresses and so on. Despite the fact that using ldap to query group membership may seem trivial, in a lot of appliances, this simple feature is not available or does not work very well. When it comes down to Netscreen, I have found that using ldap is not the way to go. You can use ldap for authentication, but you won’t be able to implement granularity in terms of AD groups, and set specific policies combined with AD group membership . However, Radius will do just fine, and the nice thing is : you can easily turn your Windows DC into a Radius server.
Before explaining how you can set this up, let’s define what we want to accomplish :
- Allow end-users to activate a firewall policy by authenticating to the netscreen firewall, using their AD username and password
- Allow administrators to specify who can authenticate to the firewall
- Allow administrators to create firewall policies and assign a certain AD group or certain AD groups to those policies, so only members of that group will be able to activate that specific rule (or set of rules)
One more note before getting started : Juniper supports different Account types : Admin, Auth, XAuth, L2TP and 802.1x. Each of those types have specific features, so it is important to understand their use and limitations :
Since we want to use User Groups, we’ll need to use either local users or Radius. How will the Juniper know which AD Group was used ? We’ll tell the Radius server to pass back the name of the group to the Juniper firewall, and we’ll define an “external group” on the Juniper with exactly the same name. That External Group can be used in your policy, and Radius will take care of authentication.
The following configuration guide will be based on the following configuration :
- The management IP address on the LAN interface of the Juniper firewall is 1.1.1.2. The LAN interface of the firewall is 1.1.1.1
- We’ll enable Web Authentication on ethernet0/0 (LAN), on virtual IP 1.1.1.3, using SSL
- The shared secret between the Firewall and the Radius server is ThisIsATest (This is a really bad shared secret. You should choose a longer and more complex shared secret in real life. Use at least 16 characters !)
- The Active Directory IAS server runs on 1.1.1.10
- The Active Directory Group that will be used is called “Remote Access Users”. My domain is called “CORELAN”, so the group in IAS will be “CORELAN\Remote Access Users”
-
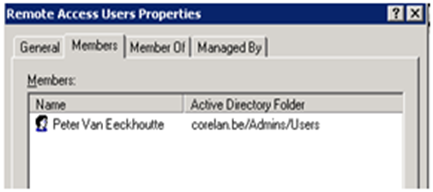
Put your AD users in the AD group
First, install IAS on a Windows Server :
Click on Start, go to Settings and open Control Panel
Open Add or Remove Programs
Click Add/Remove Windows Components
Select Networking Services and click Details
Enable Internet Authentication Service
Click OK and then Next to install IAS
Next, configure IAS to work with Netscreen
Click Start, go to Programs, Administrative Tools and click Internet Authentication Service
This will launch the IAS MMC :
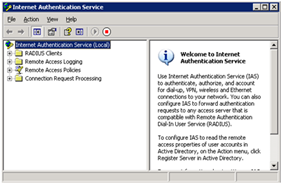
First, we need to set the Radius Authentication and Radius Accounting ports to the same ports that will be used by the Netscreen device. Right click on “Internet Authentication Server (Local)” and choose Properties
Set a Server description in the “General” section.
Open the “Ports” tabsheet
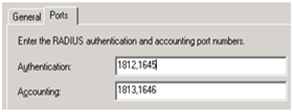
Remove 1812 from Authentication and 1813 from Accounting. You should only have port 1645 and 1646 configured :
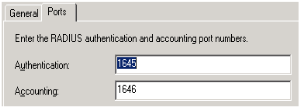
Click “OK” to save the changes
Click “OK” to accept restarting the service

Define a Radius client
Right click on RADIUS Clients and choose “New RADIUS Client”
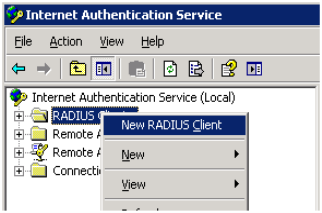
Set a friendly name and fill out the IP address that will be used to connect from the Juniper to the Radius server. In my example, this will be the management IP address on the LAN side, but you can use a sniffer on the IAS server to find out which IP address will be used.
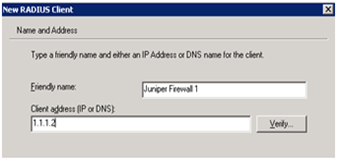
Click Next to continue
Select “RADIUS Standard” as Client-Vendor, and set the Shared Secret
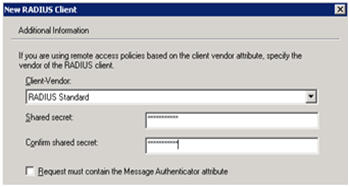
Click Finish to complete the creation of a Radius Client
Clean up default IAS policies
Before creating a new Remote Access Policy on the IAS server, we’ll clean up some of the default settings.
Open “Remote Access Policies” and remove all existing (default) policies.
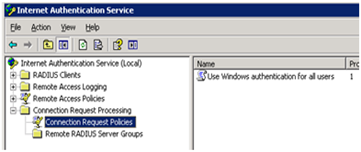
Note : do not remove the default “Use Windows authentication for all users” under “Connection Request Processing – Connection Request Policies” !
Create a new IAS Remote Access Policy
Right Click “Remote Access Policies” and choose “New Remote Access Policy”
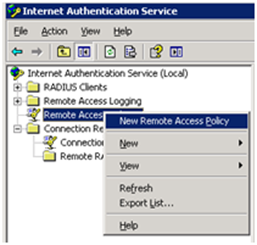
Click “Next” at the welcome screen
Select “Set up a custom policy” and provide a detailed description :
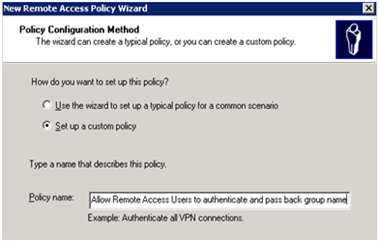
Click next to continue.
In the Policy Conditions window, click “Add”
Select “Windows-Groups” and click “Add”
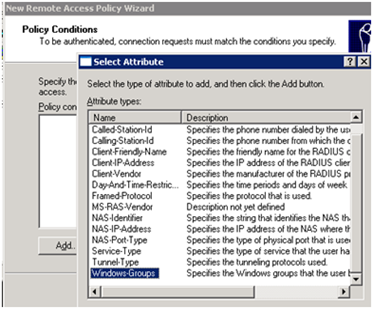
Click “Add” to add your Active Directory domain group. This will ensure that authentication will only be allowed for members of that group.
Note : If you specify multiple groups, then users need to be part of ALL of those groups before a successful authentication will occur, so pay attention to this when you set up your Radius policies. (So you’ll need multiple policies if you want to allow Radius authentication for multiple groups that are not linked to each other)
Select the AD Group
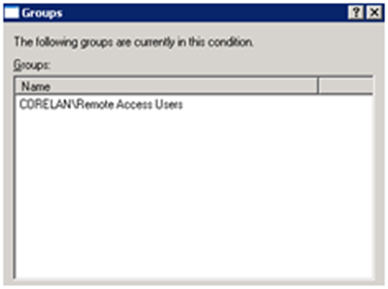
Click OK to go back to the Policy Conditions window.
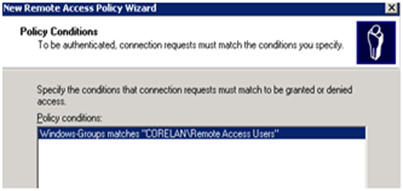
Click Next to continue.
Select “Grant Remote access permissions” and click “Next” to continue
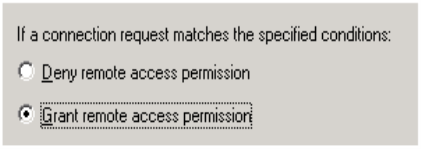
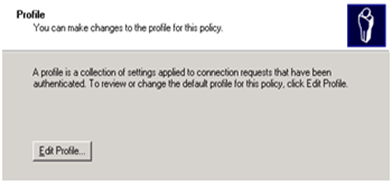
We’ll make the necessary changes to the profile in just a while, so click Next to continue at the “Profile” window
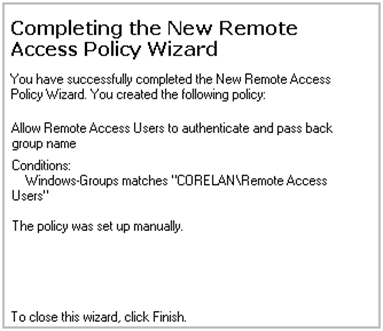
Click Finish to complete the creation of the first part of the policy
Edit the IAS Remote Access Policy to support Netscreen and pass back the name of the AD Group to the Juniper firewall
Select the newly create RAS policy, right click and choose properties
Click Edit Profile
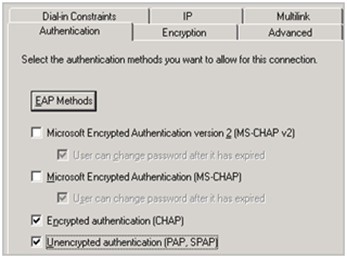
Go to the Authentication tab and make sure only CHAP, PAP/SPAP are selected :
Go to the Encryption tab and make sure “No Encryption” is enabled
Go to the Advanced tab and remove the default Attributes Service-Type and Framed-Protocol
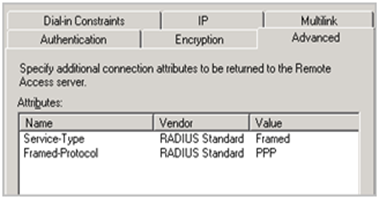
Click “Add” to add a new attribute
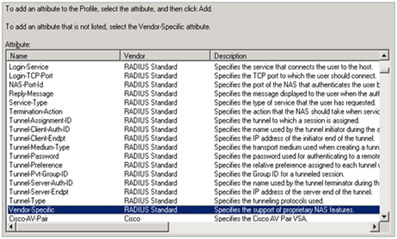
Select “Vendor-Specific” and click Add
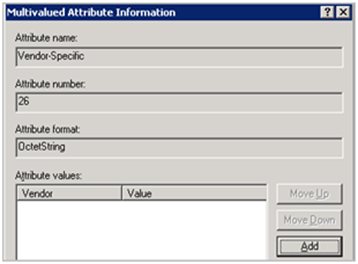
In the Multivalued Attribute Information window, click “Add” to add a new attribute
Set Vendor Code to 3224 and select “Yes. It conforms.”
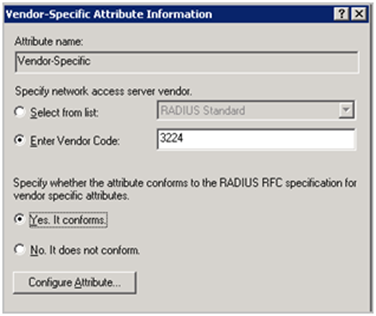
Click “Configure Attribute”
Set the Vendor-asasigned attribute number to 3. Attribute format is string. Under Attribute value, type the name of the group that you want to pass back to the Juniper firewall upon successful authentication. Pay attention to the exact writing of this name, because we’ll need to use the same string on the Juniper firewall later on. (Case Sensitive). Note : this string does not need to match the name of the AD group, but whatever you specify here will need to match the name of the group that we’ll use on the Juniper (see below)
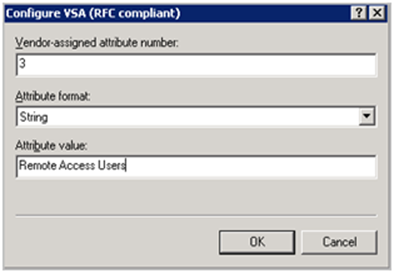
Click OK to save this new attribute
You can add more attributes, depending on your need. Juniper supports the following vendor-assigned attributes that can be passed back from a Radius server to a Netscreen device :
| VSA | Netscreen VSA | VSA Type | Description |
| 1 | NS-Admin-Privilege | Integer | Device Admin Access Rights 1 = Root Admin Admin 2 = All VSYS Root Admin 3 = VSYS Admin Admin (Requires VSA#2 VSYS Name) 4 = Read-Only Admin 5 = Read-Only VSYS Admin (Requires VSA#2 VSYS Name) |
| 2 | NS-VSYS-Name | String | Name of VSYS, used for Admin Privileges |
| 3 | NS-User-Group | String | Name of the group, needs to match External Group definition name |
| 4 | NS-Primary-DNS | IP Address | Assign Primary DNS, Used with XAuth / L2TP |
| 5 | NS-Secondary-DNS | IP Address | Assign Secondary DNS, Used with XAuth / L2TP |
| 6 | NS-Primary-WINS | IP Address | Assign Primary WINS, Used with XAuth / L2TP |
| 7 | NS-Secondary-WINS | IP Address | Assign Secondary WINS, Used with XAuth / L2TP |
In the Vendor-Specific Attribute Information window click OK to save the changes
In the Multivalued Attribute Information window click OK to save the changes
In the Add Attribute window click Close to save the changes
In the Edit Dial-in Profile window click OK to save the changes

Click “No”
Close the RAS Policy by clicking OK
Great – IAS is now ready for authenticating users in the CORELAN\Remote Access Users groups
Start the service and make sure the service is started automatically when the server boots.
Note : if you have multiple IAS servers, configured to be used by Juniper, you can keep the IAS configuration in sync using the following commands
On the first server, where you are making IAS changes, create a scheduled task that will run the following commands :
netsh aaaa dump > c:\iasconfig.txt
copy c:\iasconfig.txt \\server2\c$
On the second server, create a scheduled task that will run the following command :
netsh exec c:\iasconfig.txt
Prepare Juniper to use an external Radius Authentication Server
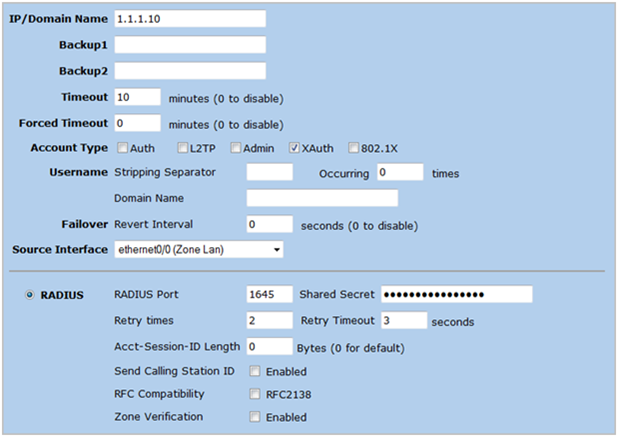
Log on to the firewall management website, go to Configuration, Auth and open Auth Servers
In the right pane, click “New” to add a new Radius server definition
Provide a name for the Auth Server definition (e.g. AD Radius)
Fill out the following field :
IP/Domain Name : IP address of you Radius server. If you have multiple Radius IAS Servers, you can specify up to 2 backup Radius servers. You’ll need to keep the config on all of these servers in sync yourself.
The timeout value allows you to specify the number of minutes of idle time (no new connections) after which a user needs to authenticate again.
Select Auth and/or XAuth as account type (XAuth allows you to specify DNS and WINS server for VPN users, Auth should do fine if you just want to use WebAuth to activate policy rules)
Choose the source interface (the interface used to connect to the IAS server). Note : in my setup, even though I’ve selected the interface on my LAN zone, the IP address used to connect to Radius is the Management IP on that LAN zone, not the interface IP on that interface.
Select RADIUS
Verify that the Radius port is set to 1645 and set the Shared Secret
Click OK to save
Note : you can do the same using the CLI :
set auth-server “AD Radius” id 1
set auth-server “AD Radius” server-name “1.1.1.10”
set auth-server “AD Radius” account-type auth xauth
set auth-server “AD Radius” src-interface “ethernet0/0”
set auth-server “AD Radius” radius secret “ThisIsATest”
set auth-server “AD Radius” fail-over revert-interval 60
set auth default auth server “AD Radius”
set auth radius accounting port 27911
save
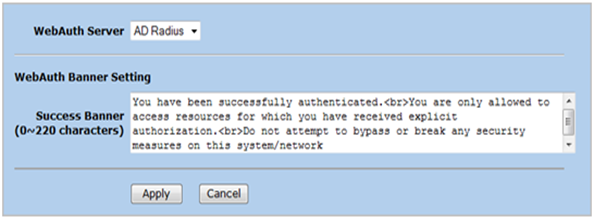
Go to Configuration – Auth – WebAuth and set the default WebAuth mechanism to your newly create Auth Server
Define the text that should be displayed when a user is successfully authenticated and click Apply .
CLI :
set webauth server “AD Radius”
set webauth banner success “You have been successfully authenticated.
You are only allowed to access resources for which you have received explicit authorization.
Do not attempt to bypass or break any security measures on this system/network”
save
Enable Web Authentication on one of the interfaces
Before you can use webauth, you need to create a virtual IP address that will host the WebAuth website. Choose the right interface, depending on where your remote users will connect from.
set interface “ethernet0/0” webauth ssl-only
set interface “ethernet0/0” webauth-ip 1.1.1.3
save
Create an external group that matches the name of the group that is passed back from the IAS to the Juniper
set user-group “Remote Access Users” location external
set user-group “Remote Access Users” type auth
save
Create a policy that will invoke web authentication
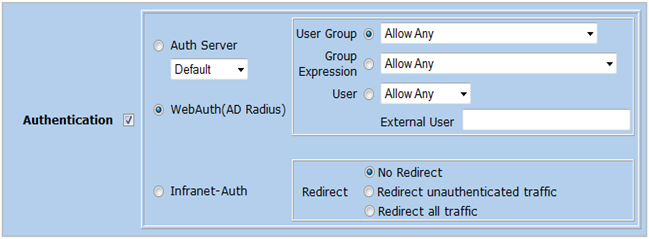
Create a new firewall policy using the GIU. Select the source and destination addresses, select the service that is allowed. Click “Advanced”
Enable “Authentication” and select “WebAuth“. Select “User Group” and pick the newly created External Group from the list
Click OK to save your policy.
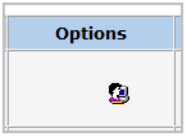
You’ll see a user icon in the policy, indicating that this policy requires authentication prior to become active for that user
Test your setup by trying to access the resources that are allowed by the new policy. It should not work.
Browse to https://1.1.1.3, authenticate using an Active Directory username and password of a user that is member of the “CORELAN\Remote Access Users” group and, upon successful authentication, you should get the banner.
Now try to access the same resource again. It should work now
Group Expressions
We have now successfully set up a policy that requires authentication and AD group membership before being activated. You can combine external groups into group expressions. This feature allows you to use logical operands to combine certain groups and be more specific on who you want to allow on certain rules.
Suppose you have 3 groups (and 3 Radius policies), and you have created 3 External Groups (Group1, Group2 and Group3), and you want to allow a user to activate a rule if the user is part of Group1 and Group2; or if the user is member of Group3, then you can create 2 group expressions and combine those into a third expression :
set group-expression “Remote Access1” “Group1” and “Group2”
set group-expression “Remote Access2” “Group3”
set group-expression “Remote Access Usergroup” “Remote Access1” or “Remote Access2”
save
You can use the “Remote Access Usergroup” in the policy.
Group Expressions make use of the “or”, “and” and/or “not” operators. Objects can be auth users, auth user groups, or other group expressions.
A note on AD group hierarchies
If user1 is member of Group1 and member of Group2 as well, and if all members of Group1 are members of Group2 as well, but you still want to use both External Groups on your Juniper, then you need to pass back multiple groups from the IAS to the Juniper. So you Radius policy, authenticating members of Group1, would need to pass back 2 “User-Groups”, one with string “Group1” and one with “Group2”. If not, depending on the order of the Radius policies in IAS, you won’t be able to use one of the groups, so webauth won’t work as expected.
Troubleshooting
On the Juniper, you can debug the radius authentication by using debug auth radius
When a user is authenticated, you can see the authenticated users table using get auth table This allows you to see the current timeout value for a user as well. If you want to disconnect all users, use clear auth table
On the IAS server, use a sniffer to see if the IP address used by the Juniper matches with what you have defined as a RADIUS client. Additionally you can enable logging on the IAS Server as well.
Security
Radius/PAP/Chap are weak protocols – they are clear text or can be easily decrypted. It is advised to use IPSec to protect traffic from the Juniper firewall to the Radius server(s).
© 2007 – 2019, Peter Van Eeckhoutte (corelanc0d3r). All rights reserved.
Similar/Related posts:
 Juniper : Netscreen Remote Dial-UP VPN with AD Radius Authentication and route based VPN / tunnel interface
 Juniper ScreenOS Admin authentication using Windows based IAS (Radius)
 Windows XP L2TP over IPSec dialup client VPN to a Juniper ScreenOS firewall, using Certificates
 Securing Windows Server 2008 and Active Directory
 Free tool – PVE Active Directory Disable Users
4 Responses to Using Active Directory and IAS based Radius for Netscreen WebAuth authentication
Corelan Training
Check out our schedules page here and sign up for one of our classes now!
Donate

Your donation will help funding server hosting.
Corelan Team Merchandise
Corelan on Slack
You can chat with us and our friends on our Slack workspace:

