24,019 views
 Many roads to IAT
Introduction
A few days ago a friend approached me and asked how he could see the import address table under immunity debugger and if this could be done using the command line.
I figured this would be a good time to take a look at what the IAT is, how we can list the IAT and what common reversing hurdles could be with regards to the IAT.
Let’s see first what is IAT and why it’s good to know what is in there.
IAT stands for Import Address Table and according to wikipedia,
“One section of note is the import address table (IAT), which is used as a lookup table when the application is calling a function in a different module. It can be in form of both import by ordinal and import by name. Because a compiled program cannot know the memory location of the libraries it depends upon, an indirect jump is required whenever an API call is made. As the dynamic linker loads modules and joins them together, it writes actual addresses into the IAT slots, so that they point to the memory locations of the corresponding library functions. Though this adds an extra jump over the cost of an intra-module call resulting in a performance penalty, it provides a key benefit: The number of memory pages that need to be copy-on-write changed by the loader is minimized, saving memory and disk I/O time. If the compiler knows ahead of time that a call will be inter-module (via a dllimport attribute) it can produce more optimized code that simply results in an indirect call opcode.”
By knowing what’s inside IAT we can identify functions that are called from other modules in a program, look for possibly unwanted or strange behavior ( cases on virus / malware ) make the code under the debugger easier to read and find address location from functions of interest ( VirtualAlloc, HeapCreate, SetProcessDEPPolicy, NtSetInformationProcess, VirtualProtect, WriteProcessMemory ). In case you haven’t figured it out, you can use those functions to bypass DEP. Having an accurate pointer in the IAT to one of the functions will make it trivial to call the function in a ROP chain.
How can we query or list entries in the IAT ?
Windbg
Windbg is many times the debugger of my choice, not because it’s the easiest to use, but mostly I got used to the interface and the fast response. Doing things under windbg in most cases will take far less time, if you know the way and far more time if you are trying to find your way now.
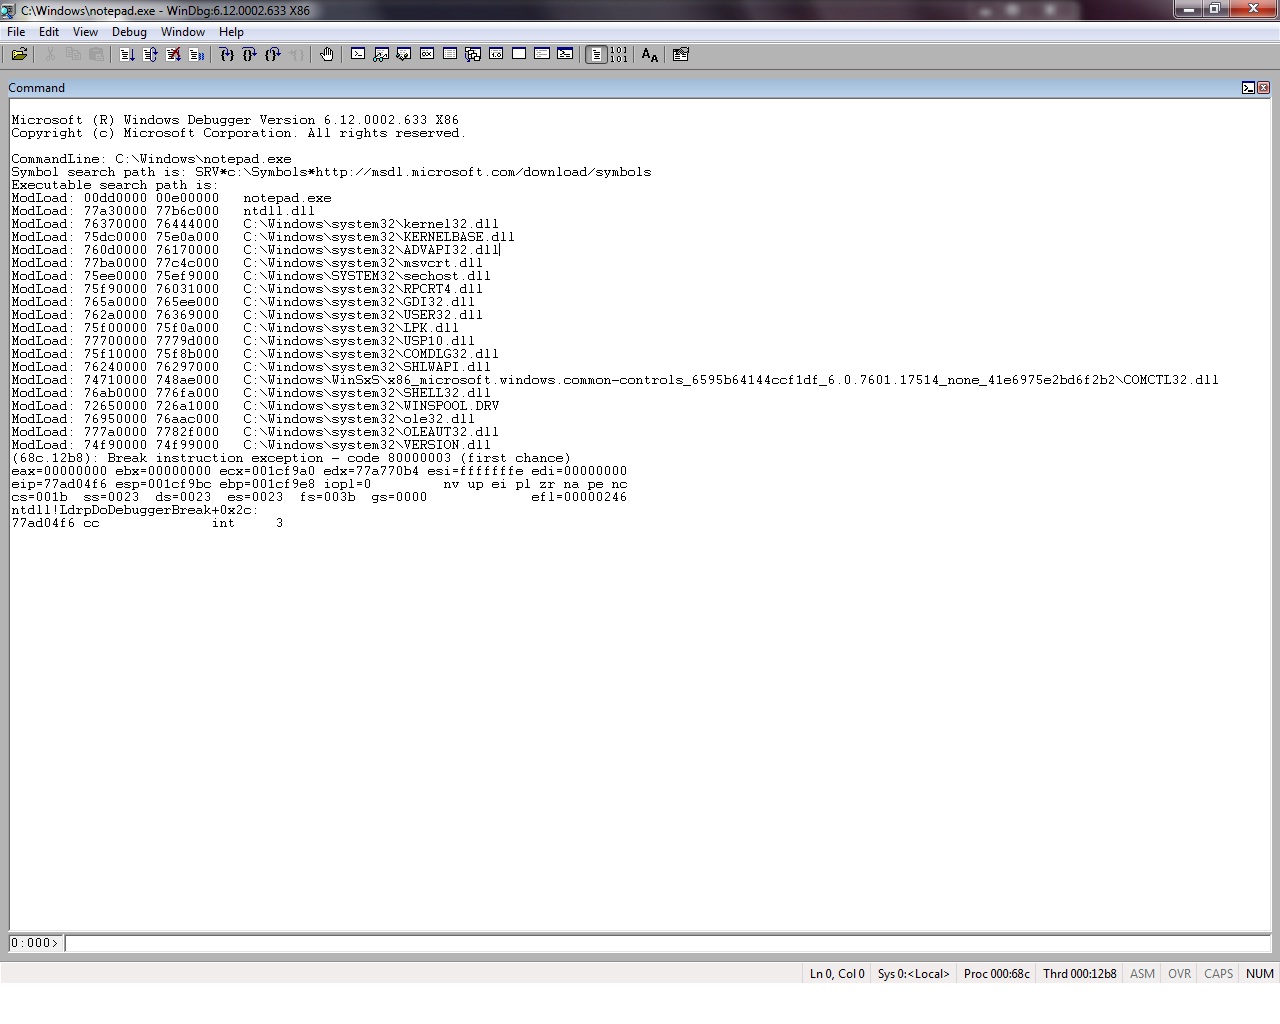
After launching windbg, this is what you’ll get:
You can start a debugging process under windbg by launching an application in the debugger (File – Open) or by attaching the debugger to a running application (File – Attach). For the purpose of this example we are going to use notepad.exe as test file,
windbg will load the modules and it will stop just before the execution of the program waiting for command. All modules loaded at this moment can be viewed in the screen.
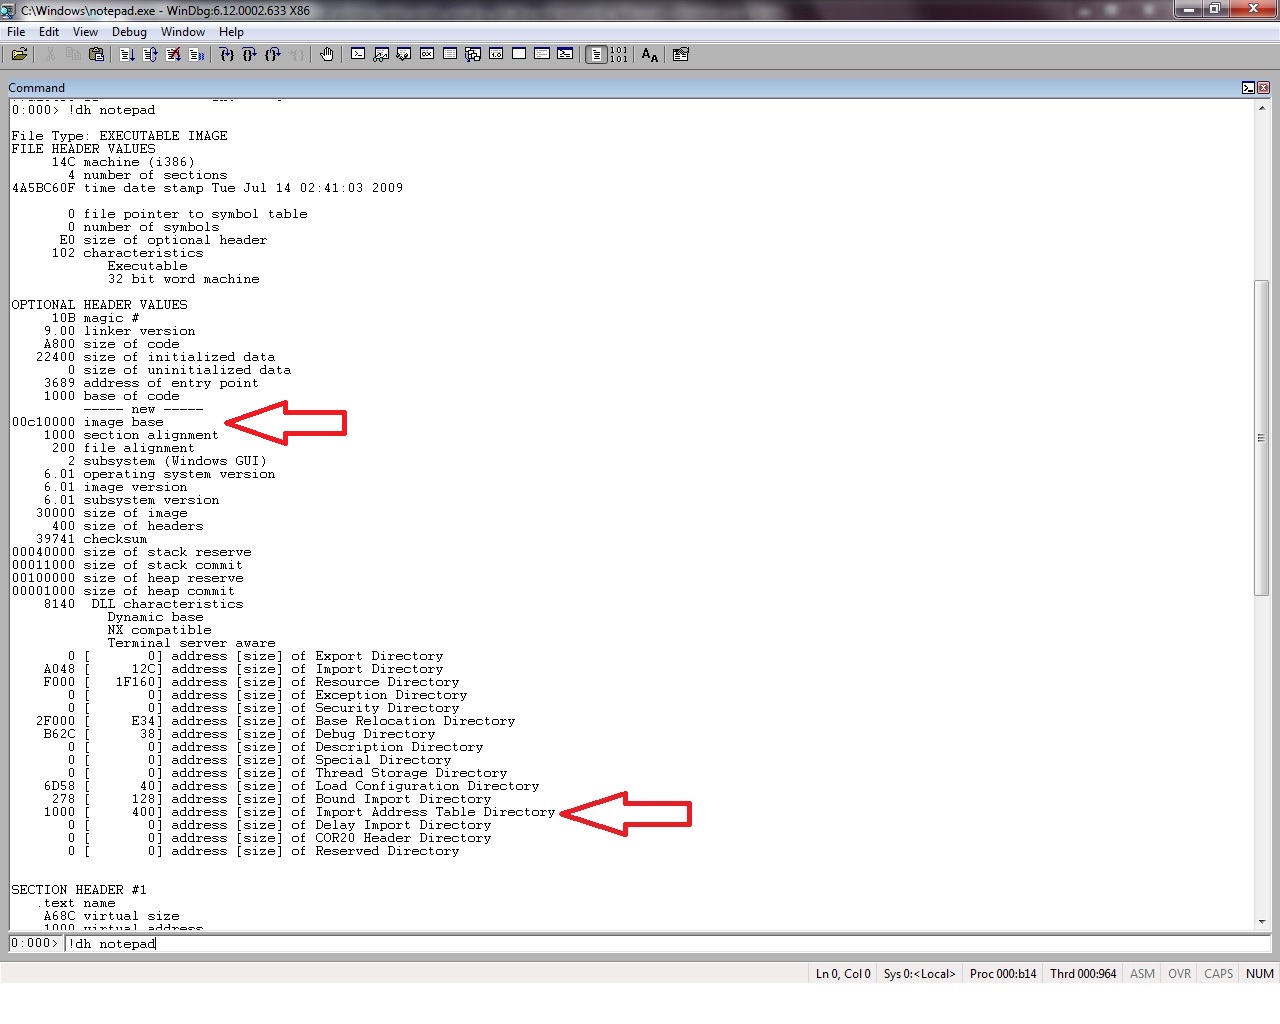
As opposed to the other two debuggers, windbg lacks the easy drop down menu commands and identifying IAT requires a bit more time. First we need to locate the address of the Import Address Table in our executable, to do so the command !dh will be used:
!dh command will Display the Headers of the requested module, (more for the commands at : http://windbg.info/doc/1-common-cmds.html) where we can identify the location, address of IAT. In my example IAT for notepad is located at memory address 1000 of the module notepad.exe.
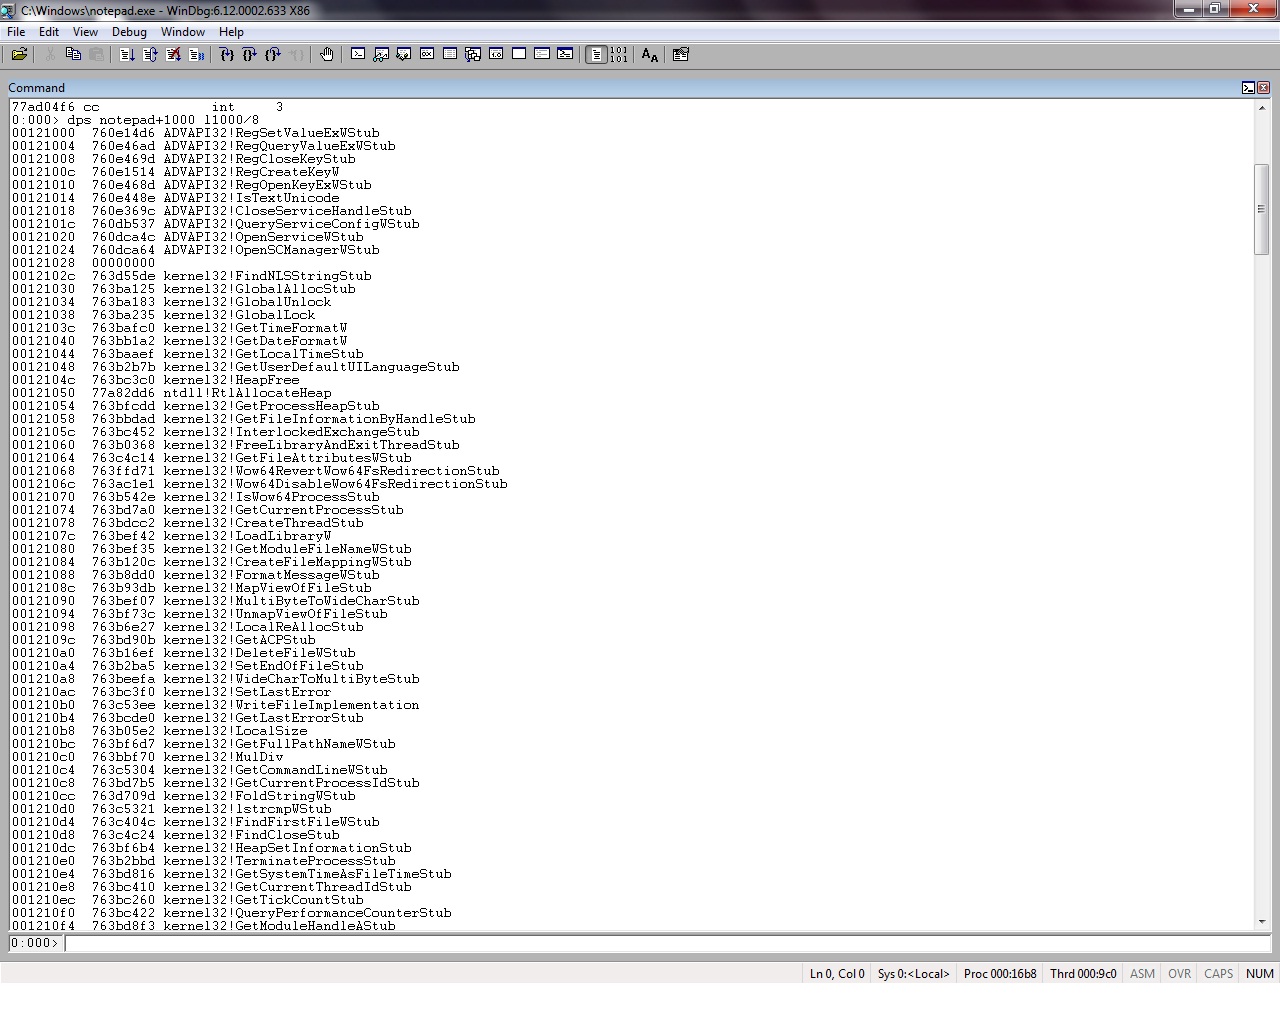
Dumping the content of the address we need to add the image base of our file plus the memory address of the IAT table, this can be done easily using two ways, either by using “dps notepad+1000 l1000/8 “ or by giving the image base address, “dps 00c10000+1000 l1000/8 “. dps command stands for display pointer-sized contents of memory in the given range.
The output of the dps command will give us a lengthy result with the contents of the IAT table and the location of the functions.
Another method again for windbg and a bit more elegant is described at http://www.osronline.com/showthread.cfm?link=155938, using the following windbg script,
1: r $t0 = poi(${$arg1}+poi(${$arg1}+0x3c)+0xd8)
2: r $t1 = poi(${$arg1}+poi(${$arg1}+0x3c)+0xdc)
3: dps ${$arg1}+$t0 l? (($t1+4)/4)
saving the script under a name, eg: test1.txt in windbg directory and calling the script from windbg with $$>a< test1.txt notepad, we will have the following output on the debugger:
0:000> $$>a< test1.txt notepad
00121000  760e14d6 ADVAPI32!RegSetValueExWStub
00121004  760e46ad ADVAPI32!RegQueryValueExWStub
00121008  760e469d ADVAPI32!RegCloseKeyStub
0012100c  760e1514 ADVAPI32!RegCreateKeyW
00121010  760e468d ADVAPI32!RegOpenKeyExWStub
00121014  760e448e ADVAPI32!IsTextUnicode
00121018  760e369c ADVAPI32!CloseServiceHandleStub
0012101c  760db537 ADVAPI32!QueryServiceConfigWStub
00121020  760dca4c ADVAPI32!OpenServiceWStub
00121024  760dca64 ADVAPI32!OpenSCManagerWStub
00121028  00000000
0012102c  763d55de kernel32!FindNLSStringStub
00121030  763ba125 kernel32!GlobalAllocStub
00121034  763ba183 kernel32!GlobalUnlock
00121038  763ba235 kernel32!GlobalLock
0012103c  763bafc0 kernel32!GetTimeFormatW
00121040  763bb1a2 kernel32!GetDateFormatW
00121044  763baaef kernel32!GetLocalTimeStub
00121048  763b2b7b kernel32!GetUserDefaultUILanguageStub
0012104c  763bc3c0 kernel32!HeapFree
00121050  77a82dd6 ntdll!RtlAllocateHeap
00121054  763bfcdd kernel32!GetProcessHeapStub
00121058  763bbdad kernel32!GetFileInformationByHandleStub
0012105c  763bc452 kernel32!InterlockedExchangeStub
00121060  763b0368 kernel32!FreeLibraryAndExitThreadStub
00121064  763c4c14 kernel32!GetFileAttributesWStub
00121068  763ffd71 kernel32!Wow64RevertWow64FsRedirectionStub
... <snip> ...
001213e0  77a64168 ntdll!RtlInitUnicodeString
001213e4  77a760f8 ntdll!NtQueryLicenseValue
001213e8  77a504a5 ntdll!WinSqmAddToStream
001213ec  00000000
001213f0  74f91a15 VERSION!GetFileVersionInfoExW
001213f4  74f918e9 VERSION!GetFileVersionInfoSizeExW
001213f8  74f91b51 VERSION!VerQueryValueW
001213fc  00000000
00121400  90909090
Common commands for windbg, http://blogs.msdn.com/b/willy-peter_schaub/archive/2009/11/27/common-windbg-commands-reference.aspx
OllyDBG
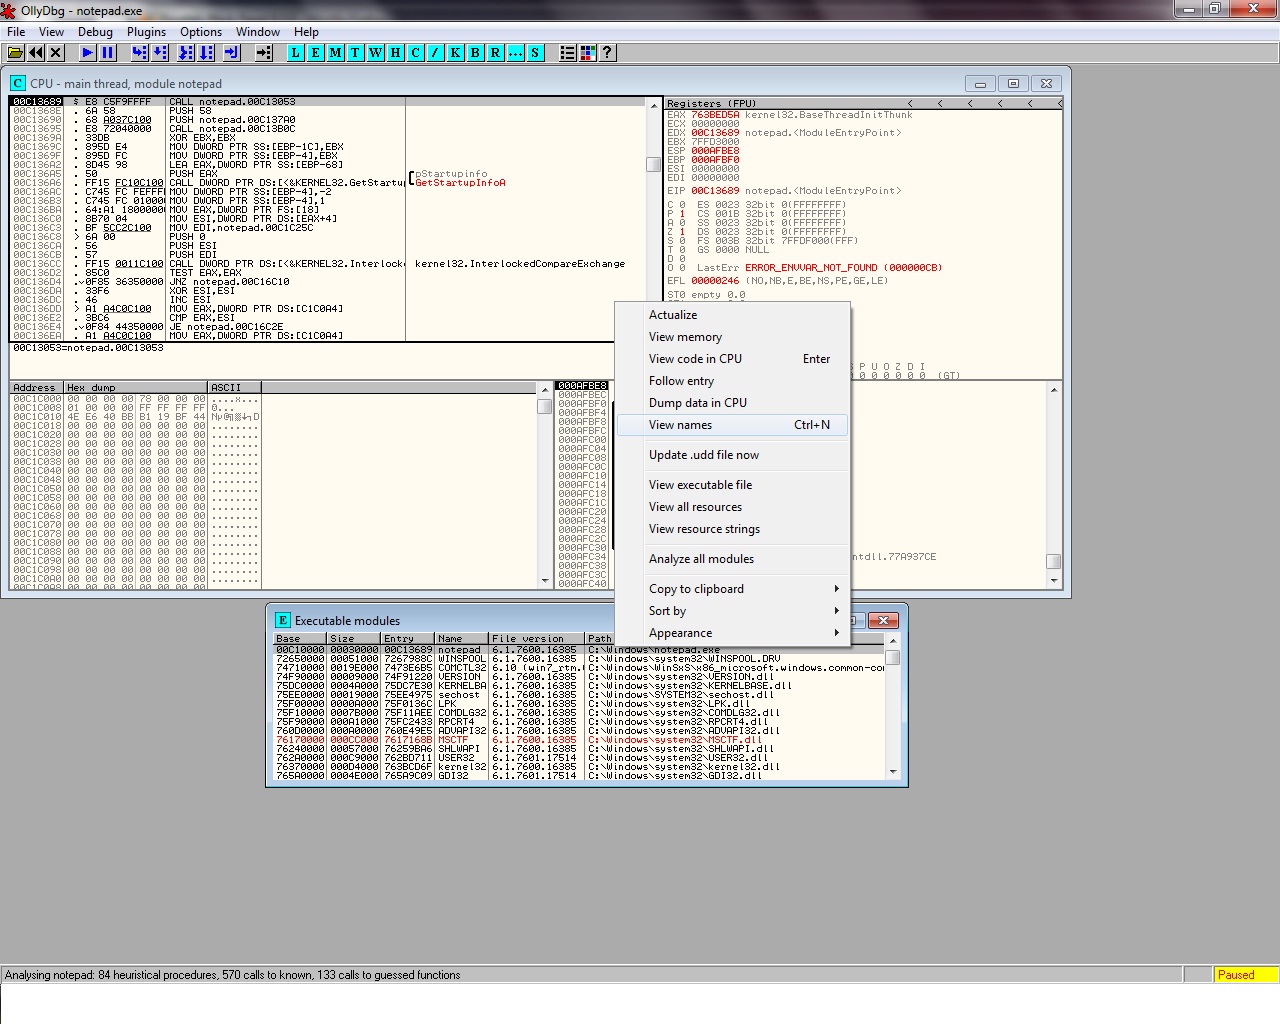
Much simpler than windbg, ollydbg will easily display the IAT using the following steps :
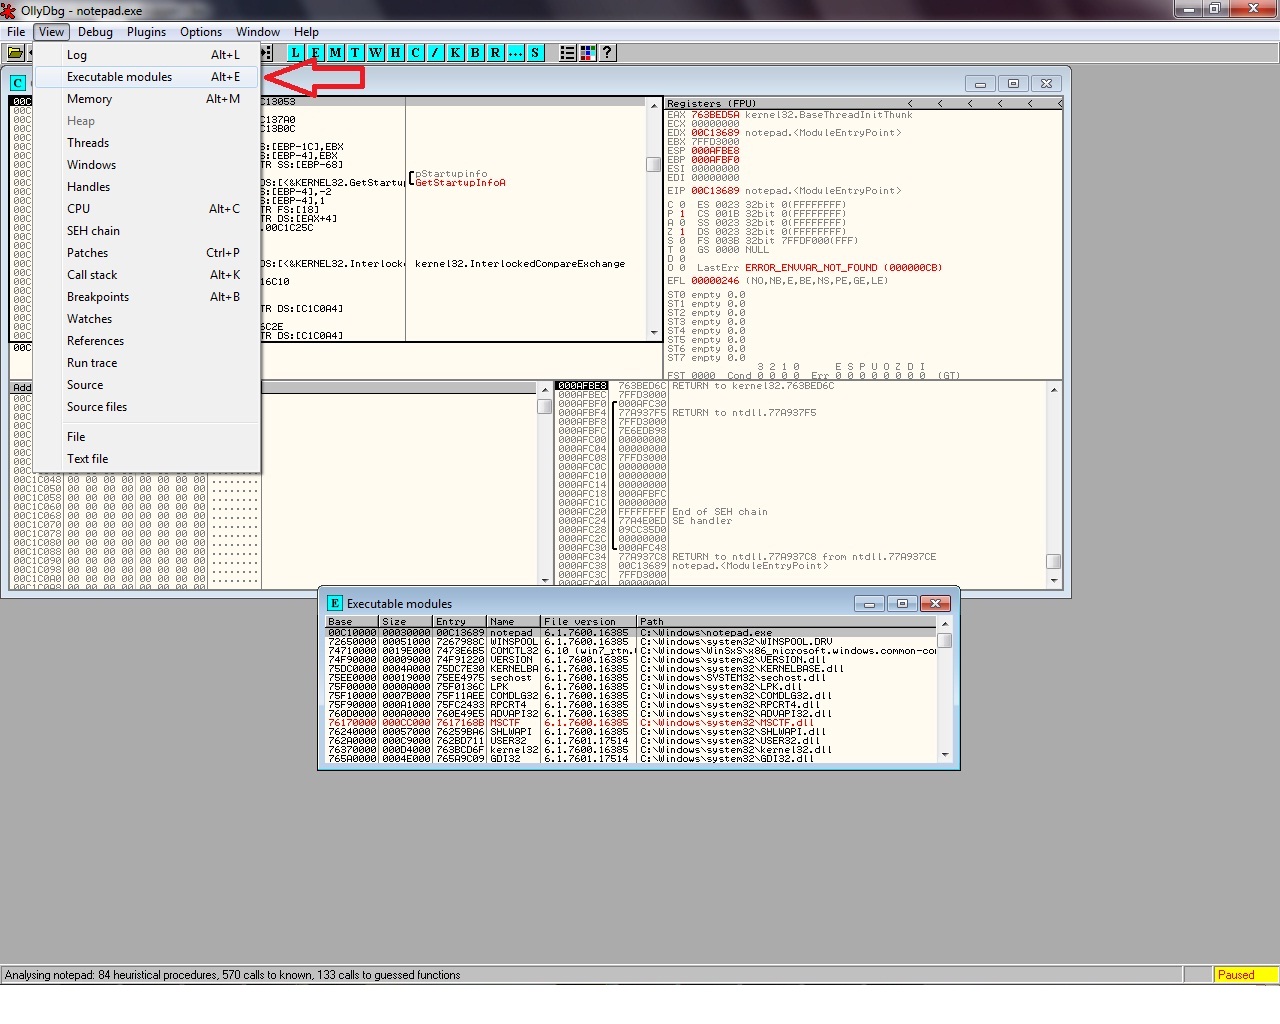
Load the executable of your choice, then from the View menu option we select “executable modules”. Next, from the window with the modules, right click on the module that you want to query, and select “View Names”
This will produce the following output:
Names in notepad
Address    Section    Type    (  Name                                    Comment
00C113D4   .text      Import     OLEAUT32.#2
00C113C8   .text      Import     COMCTL32.#345
00C113D0   .text      Import     OLEAUT32.#6
00C11178   .text      Import  (  GDI32.AbortDoc
00C11310   .text      Import     msvcrt._acmdln
00C11308   .text      Import     msvcrt._amsg_exit
00C11324   .text      Import  (  msvcrt._cexit
00C11238   .text      Import  (  USER32.CharNextW
00C111CC   .text      Import  (  USER32.CharUpperW
00C1123C   .text      Import  (  USER32.CheckMenuItem
00C11274   .text      Import  (  USER32.ChildWindowFromPoint
00C11348   .text      Import  (  COMDLG32.ChooseFontW
00C11240   .text      Import  (  USER32.CloseClipboard
00C1112C   .text      Import  (  KERNEL32.CloseHandle
00C11388   .text      Import     WINSPOOL.ClosePrinter
00C11018   .text      Import     ADVAPI32.CloseServiceHandle
00C113A0   .text      Import     ole32.CoCreateInstance
00C113A8   .text      Import     ole32.CoInitialize
00C11394   .text      Import     ole32.CoInitializeEx
00C11350   .text      Import  (  COMDLG32.CommDlgExtendedError
... <snip> ...
00C112F4   .text      Import  (  msvcrt.wcsrchr
00C110A8   .text      Import  (  KERNEL32.WideCharToMultiByte
00C1126C   .text      Import  (  USER32.WinHelpW
00C113E8   .text      Import     ntdll.WinSqmAddToStream
00C113DC   .text      Import     ntdll.WinSqmIncrementDWORD
00C1106C   .text      Import     KERNEL32.Wow64DisableWow64FsRedirectio
00C11068   .text      Import     KERNEL32.Wow64RevertWow64FsRedirection
00C110B0   .text      Import  (  KERNEL32.WriteFile
00C112E4   .text      Import  (  msvcrt._wtol
00C1131C   .text      Import     msvcrt._XcptFilter
Immunity Debugger
Immunity debugger is based on Ollydbg so the same process for displaying the IAT of a module under Ollydbg applies to it as well.
Since Immunity debugger has support for python scripting, we can use the great mona.py python script from Corelan Team (download here: http://redmine.corelan.be/projects/mona manual can be found here : https://www.corelan.be/index.php/2011/07/14/mona-py-the-manual/ ).
Let’s see what options we have.
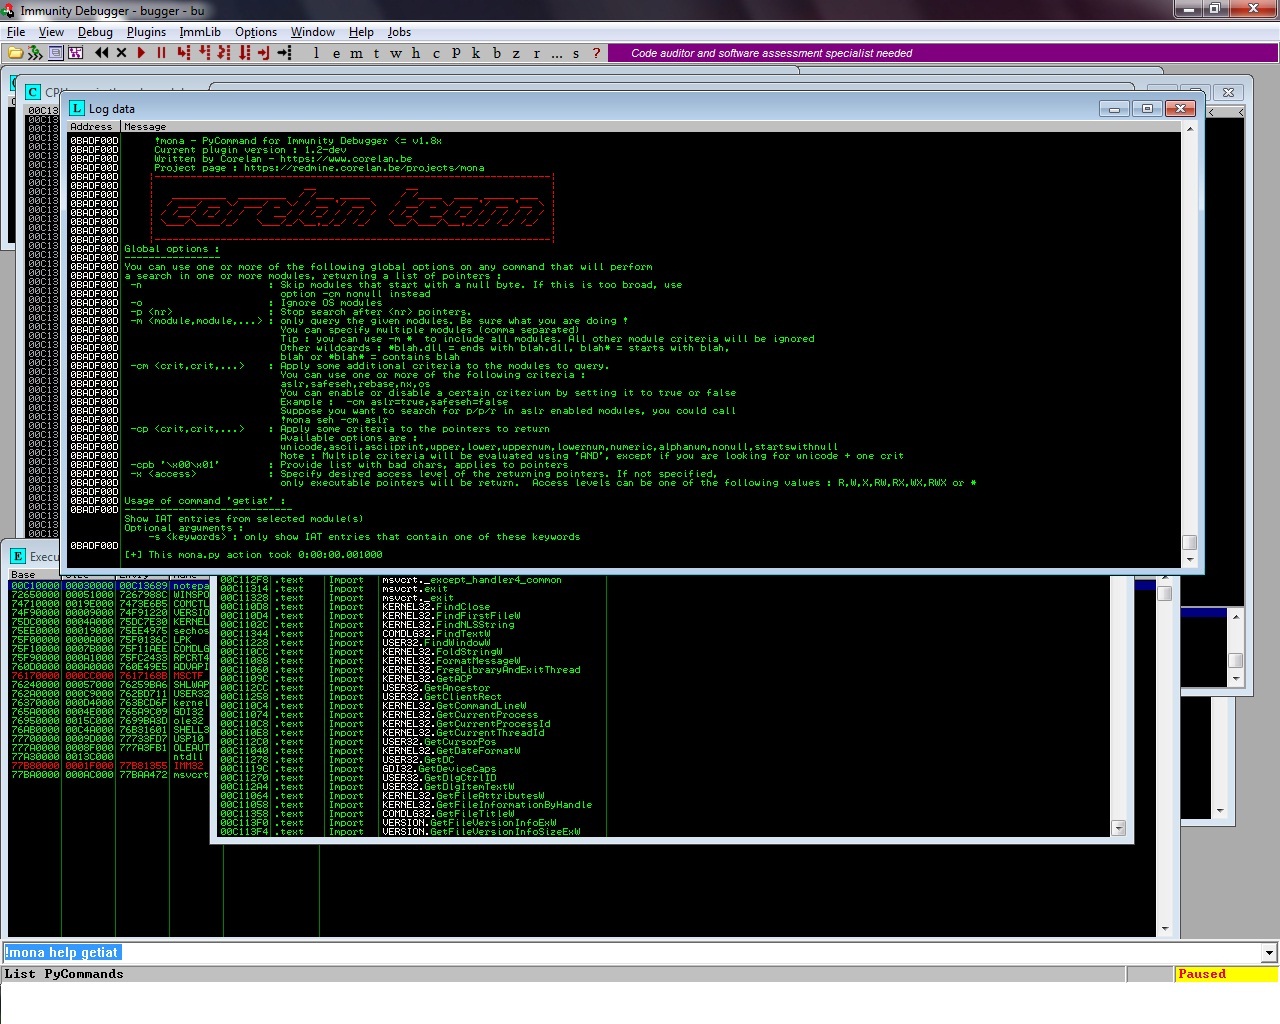
First of all mona.py includes in the latest version a new function called “getiat” making the process of enumerating the IAT table of all loaded modules a very easy process.
Running mona.py with getiat function will give us the following results:
Log data
Address    Message
75F91340   At 0x75f91340 in rpcrt4.dll (base + 0x00001340) : 0x763bd7b5 (ptr to api-ms-win-core-processthreads-l1-1-0.getcurrentprocessid)
75F910E8   At 0x75f910e8 in rpcrt4.dll (base + 0x000010e8) : 0x77a752c8 (ptr to ntdll.ntallocateuuids)
75F9117C   At 0x75f9117c in rpcrt4.dll (base + 0x0000117c) : 0x77a75348 (ptr to ntdll.ntalpccreatesectionview)
75F910EC   At 0x75f910ec in rpcrt4.dll (base + 0x000010ec) : 0x77a76218 (ptr to ntdll.ntquerysystemtime)
75F91144   At 0x75f91144 in rpcrt4.dll (base + 0x00001144) : 0x77a52fc6 (ptr to ntdll.tpallocalpccompletionex)
75F910F0   At 0x75f910f0 in rpcrt4.dll (base + 0x000010f0) : 0x77a6206f (ptr to ntdll.etweventenabled)
75F91228   At 0x75f91228 in rpcrt4.dll (base + 0x00001228) : 0x763a8d68 (ptr to api-ms-win-core-handle-l1-1-0.sethandleinformation)
75F910F4   At 0x75f910f4 in rpcrt4.dll (base + 0x000010f4) : 0x77aa9d5b (ptr to ntdll.etweventwritetransfer)
75F910F8   At 0x75f910f8 in rpcrt4.dll (base + 0x000010f8) : 0x77a427d7 (ptr to ntdll.etweventactivityidcontrol)
75F912D4   At 0x75f912d4 in rpcrt4.dll (base + 0x000012d4) : 0x75dc7ac4 (ptr to api-ms-win-core-memory-l1-1-0.virtualfree)
75F9118C   At 0x75f9118c in rpcrt4.dll (base + 0x0000118c) : 0x77a76708 (ptr to ntdll.ntsetiocompletionex)
75F910FC   At 0x75f910fc in rpcrt4.dll (base + 0x000010fc) : 0x77a75338 (ptr to ntdll.ntalpccreateresourcereserve)
75F91414   At 0x75f91414 in rpcrt4.dll (base + 0x00001414) : 0x75dc99af (ptr to api-ms-win-security-base-l1-1-0.equalsid)
75F91300   At 0x75f91300 in rpcrt4.dll (base + 0x00001300) : 0x75de3c94 (ptr to api-ms-win-core-namedpipe-l1-1-0.getnamedpipeclientcomputernamew)
... <snip> ...
747111EC   At 0x747111ec in comctl32.dll (base + 0x000011ec) : 0x765a72c0 (ptr to gdi32.bitblt)
747111F0   At 0x747111f0 in comctl32.dll (base + 0x000011f0) : 0x765a5ddf (ptr to gdi32.getstockobject)
747111F4   At 0x747111f4 in comctl32.dll (base + 0x000011f4) : 0x765af4e3 (ptr to gdi32.createpen)
747111F8   At 0x747111f8 in comctl32.dll (base + 0x000011f8) : 0x765afc35 (ptr to gdi32.getcharwi
Making things even easier, mona.py has the ability to search for a specific function using the “-s” parameter, so the command “!mona getiat –s *virtualalloc*” will give us these result:
           ---------- Mona command started on 2011-10-19 11:54:18 ----------
0BADF00D   [+] Processing arguments and criteria
0BADF00D       - Pointer access level : X
0BADF00D   [+] Generating module info table, hang on...
0BADF00D       - Processing modules
0BADF00D       - Done. Let's rock 'n roll.
0BADF00D   [+] Querying 22 modules
0BADF00D   [+] Preparing log file 'iatsearch.txt'
0BADF00D       - (Re)setting logfile c:\logs\notepad\iatsearch.txt
76371818   At 0x76371818 in kernel32.dll (base + 0x00001818) : 0x75df3691 (ptr to kernelbase.virtualallocexnuma)
76371914   At 0x76371914 in kernel32.dll (base + 0x00001914) : 0x75dc7a4f (ptr to api-ms-win-core-memory-l1-1-0.virtualalloc)
76371918   At 0x76371918 in kernel32.dll (base + 0x00001918) : 0x75dc7a08 (ptr to api-ms-win-core-memory-l1-1-0.virtualallocex)
77BA11BC   At 0x77ba11bc in msvcrt.dll (base + 0x000011bc) : 0x75dc7a4f (ptr to api-ms-win-core-memory-l1-1-0.virtualalloc)
7695143C   At 0x7695143c in ole32.dll (base + 0x0000143c) : 0x75dc7a4f (ptr to api-ms-win-core-memory-l1-1-0.virtualalloc)
76AB12F8   At 0x76ab12f8 in shell32.dll (base + 0x000012f8) : 0x75dc7a4f (ptr to api-ms-win-core-memory-l1-1-0.virtualalloc)
75F912C4   At 0x75f912c4 in rpcrt4.dll (base + 0x000012c4) : 0x75dc7a4f (ptr to api-ms-win-core-memory-l1-1-0.virtualalloc)
726512C8   At 0x726512c8 in winspool.drv (base + 0x000012c8) : 0x763bc43a (ptr to virtualalloc)
760D16D0   At 0x760d16d0 in advapi32.dll (base + 0x000016d0) : 0x763ac783 (ptr to kernel32.virtualallocex)
           [+] This mona.py action took 0:00:00.844000
IDA Pro
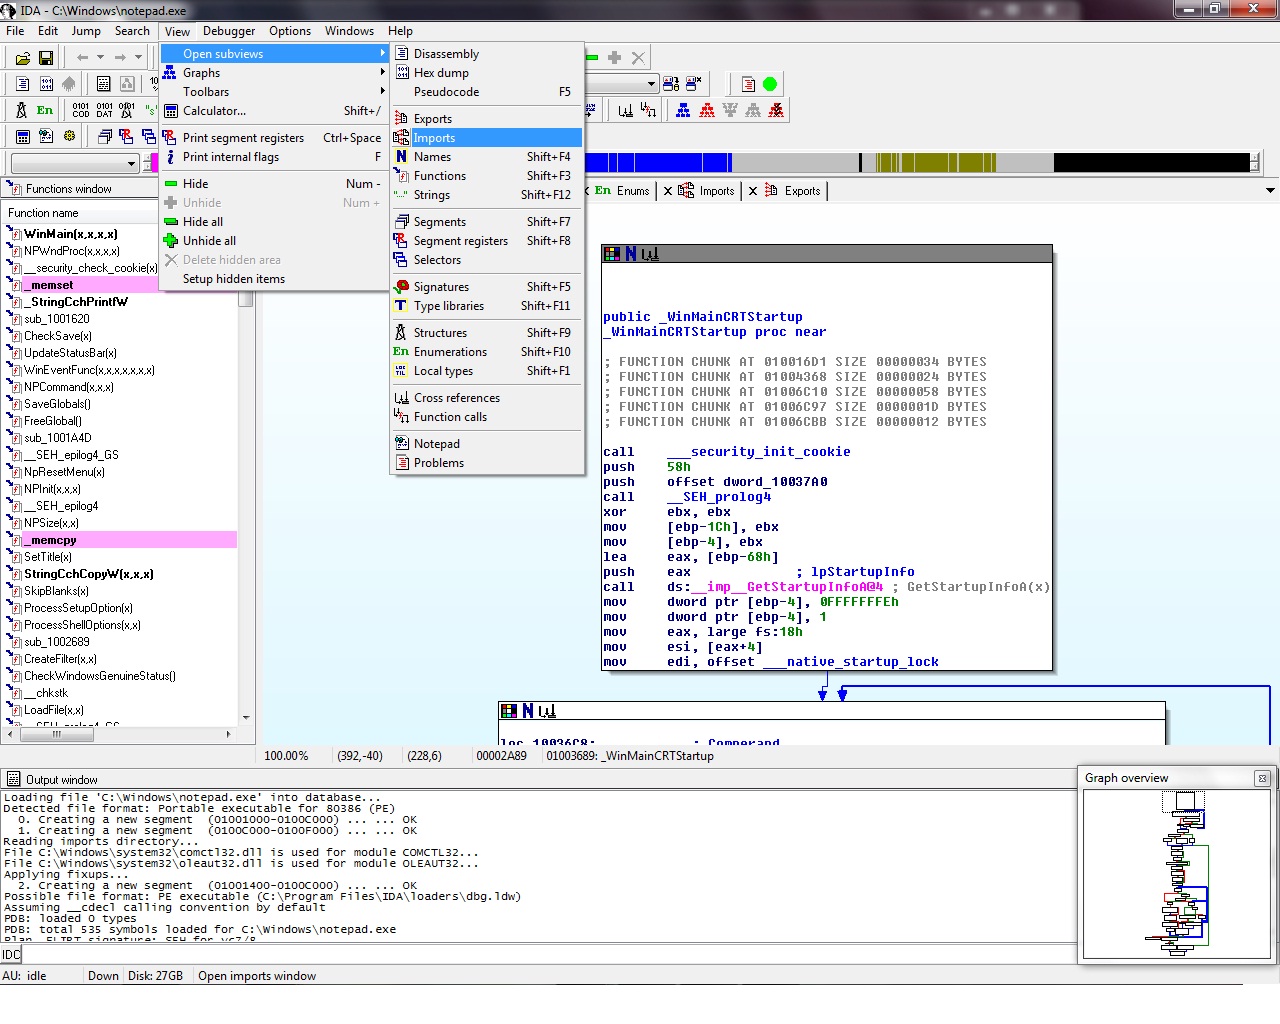
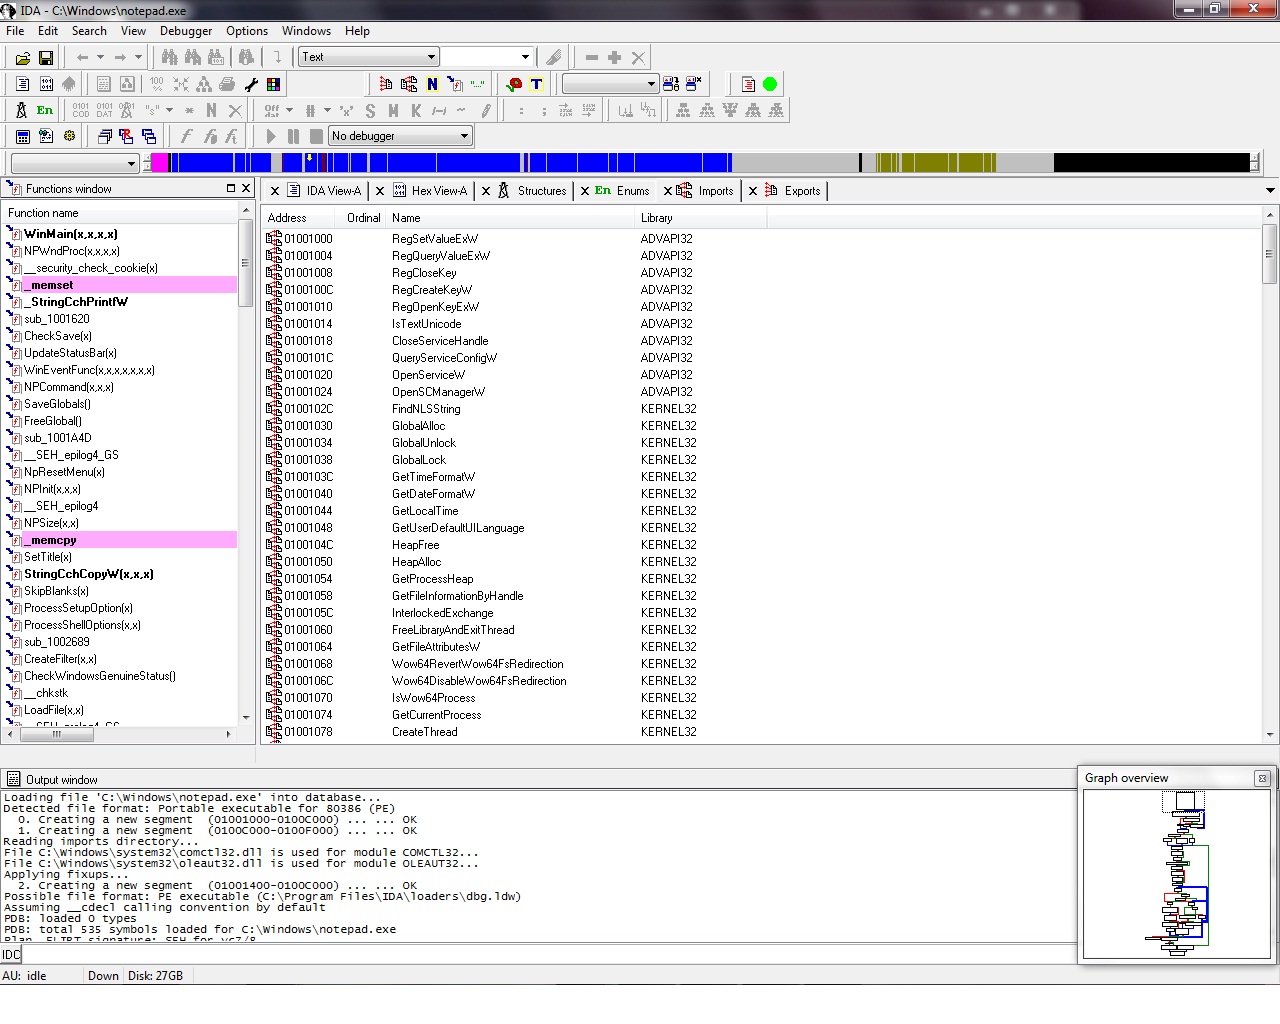
Listing IAT under IDA pro, is much more straight forward than in other debuggers.
After loading our executable in the debugger/disassembler we can view the import table by either going at menu options,
or directly from the imports tab
You can find more info on IAT at
- http://sandsprite.com/CodeStuff/Understanding_imports.html
- http://en.wikipedia.org/wiki/Portable_Executable
- http://msdn.microsoft.com/en-us/magazine/cc301808.aspx
What if the IAT looks… weird ?
During malware analysis, there are many times that a researcher will discover that binary samples are often encrypted or packed, and the IAT is relocated.
This means that the IAT is usually altered, and there are a few ways to do that :
- IAT redirection
- simple redirection
- function entry emulation redirection
- API emulation
IAT Redirection
A normal IAT table should be constructed with the addresses of the functions
Program -> API Functions
In a situation that IAT table is packed and redirected, IAT is using a proxy address to locate the functions
Packet Program -> Proxy -> API Functions
This method is used in the ‘SafeDisc’ copy protection mechanism.
Simple Redirection
Simple redirection is done by overwriting all windows function pointers with pointers back into the protector’s code. The protector is using PUSH to put the actual API location on the stack and uses a RET instruction emulating a jump to the correct function.
Function entry emulation
In function entry emulation redirection, the IAT table is constructed with references to functions. Those functions often contain some simple instructions with no actual meaning, which are then followed by the actual jump to the real API location. The ‘meaningless’ instructions are used to complicate the use of automatic unpackers and make it more difficult for people that will try to research and reverse engineer the process.
API Emulation
Making things more complicated, API emulation will emulate real API function calls and will return valid (in terms of structure) but wrong information back to unpackers.
A simple example is : it would return the return values of GetTempPath instead of the ones from GetWindowsDirectory.
More info on the methods can be found here :
- http://securitylabs.websense.com/content/Assets/HistoryofPackingTechnology.pdf
- http://msdn.microsoft.com/en-us/library/windows/desktop/ms724454(v=vs.85).aspx
Some well known protectors are ASProtect, Themida and Armadillo.
Rebuilding IAT
ImpREC / LordPE
In order to rebuild the IAT table you will need some tools to make your life easier.
If you plan on using ollydbg/immunity debugger to do the reverse engineering of the packed binary, you will need the following 2 tools :
- ImpREC ( http://www.woodmann.com/collaborative/tools/index.php/ImpREC )
- LordPE ( http://www.woodmann.com/collaborative/tools/index.php/LordPE ).
ImpREC is probably the best known IAT re-constructor/re-builder
LordPE can dump process from the memory, edit PE header sections etc. LordPE was the first tool released for that matter but under Windows 7 you might encounter problems using it.
Alternatively PEtools ( http://uinc.ru/files/neox/PE_Tools.shtml ) , CFF explorer ( http://www.ntcore.com/exsuite.php ) and PE explorer ( http://www.heaventools.com/overview.htm ) can be used to do the same thing.
The most common packer for exe files that can be found is undoubtedly UPX (http://upx.sourceforge.net/).
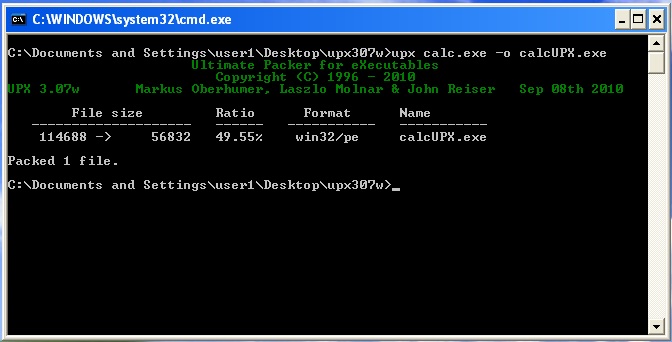
Using the upx executable, we can pack an executable file from the command line :
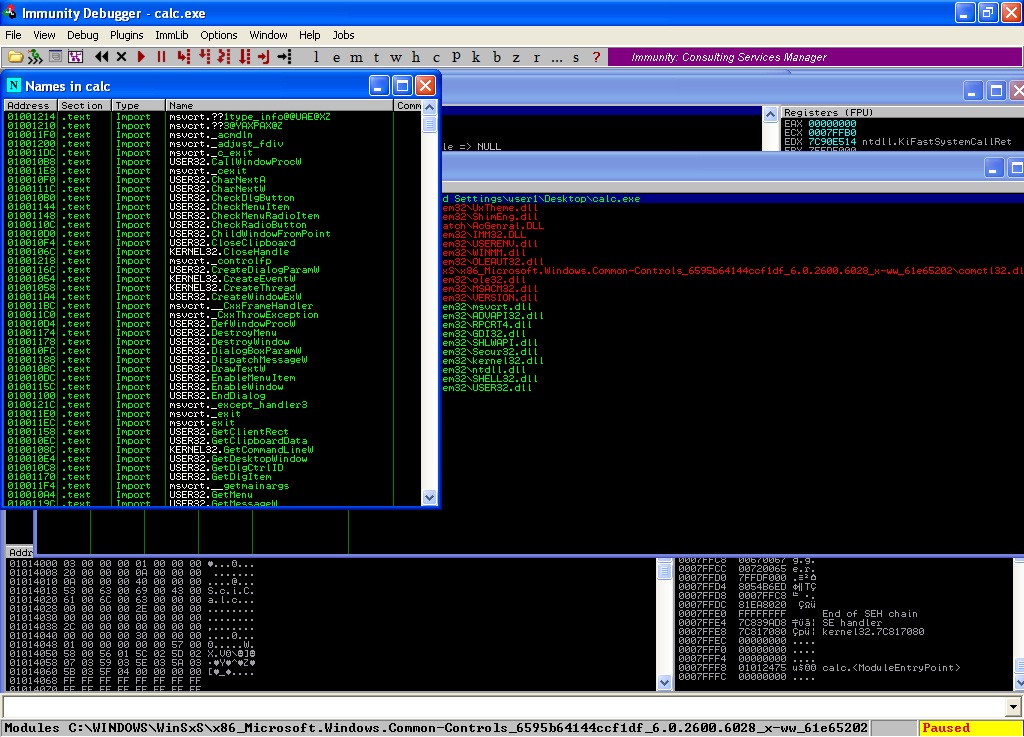
When you load the non-packed version of calc.exe ( the normal calculator that exists in Windows XP SP3 ) in immunity debugger or ollydbg, you should see the following list of imported functions:
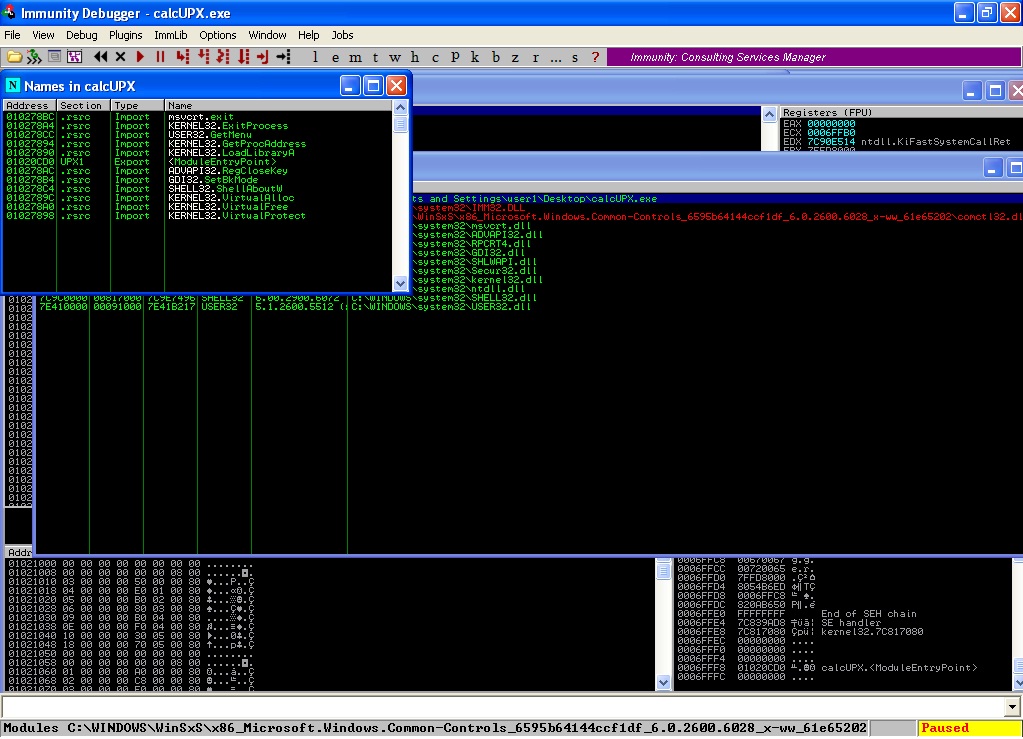
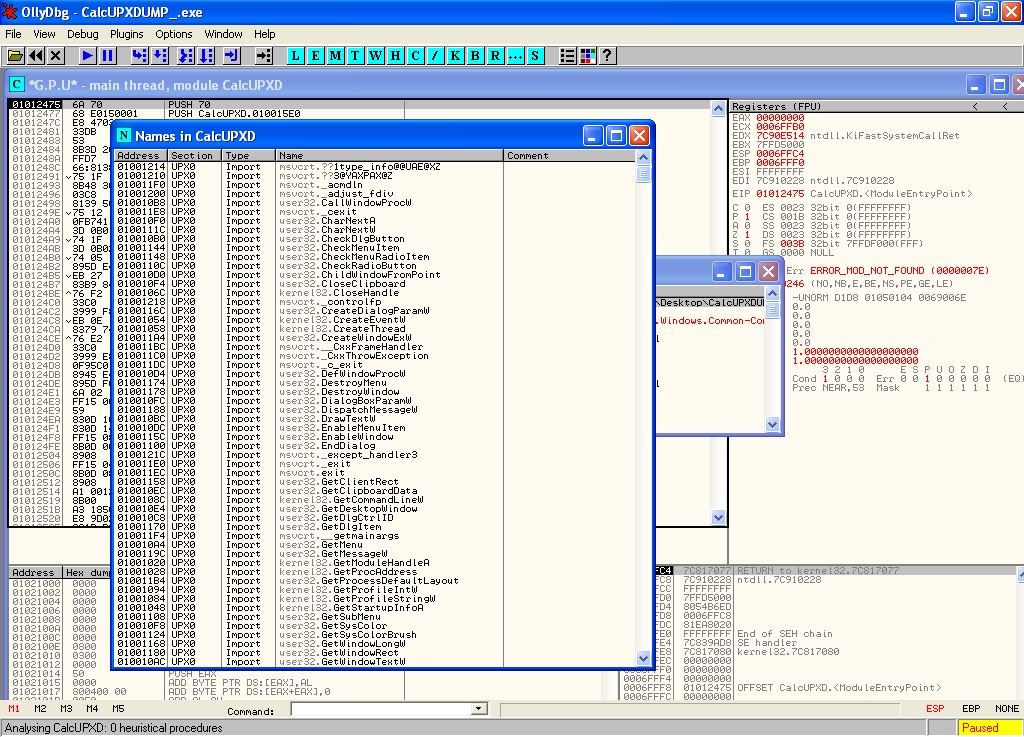
Loading the UPX packed file, you’ll see the list will be significant smaller:
Packed or not, encrypted or not, the CPU can understand only machine code. That means that, in order for the actual code to run, the executable must get unpacked at some point. To us, it’s just a matter of catching that moment. (Danny Quist, Valsmith Covert Debugging)
So, if we want to manually unpack the UPX packed file and re-building the IAT we have to find the actual OEP ( original entry point ) of our code. This is where the “decoder/decryptor/unpacker” routine is located.
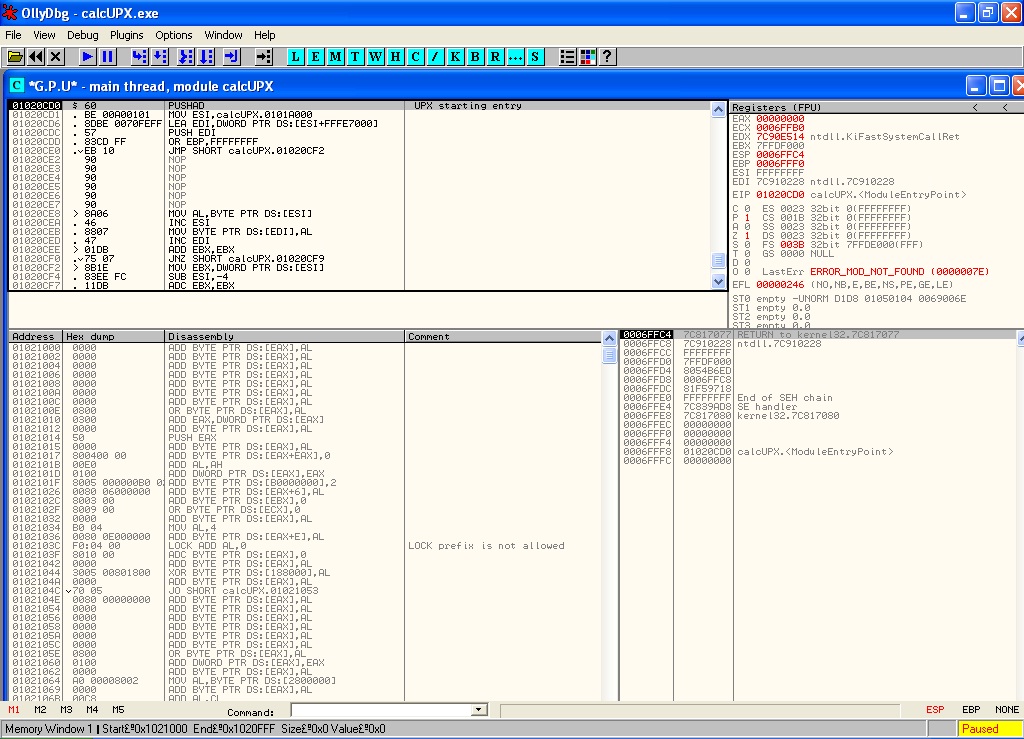
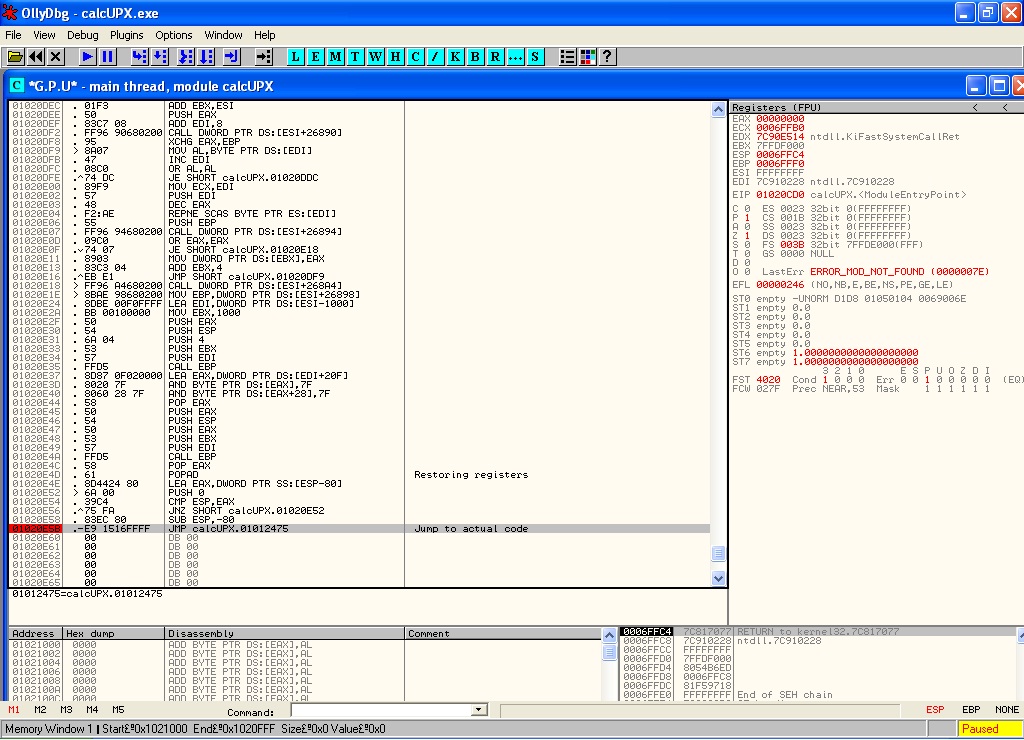
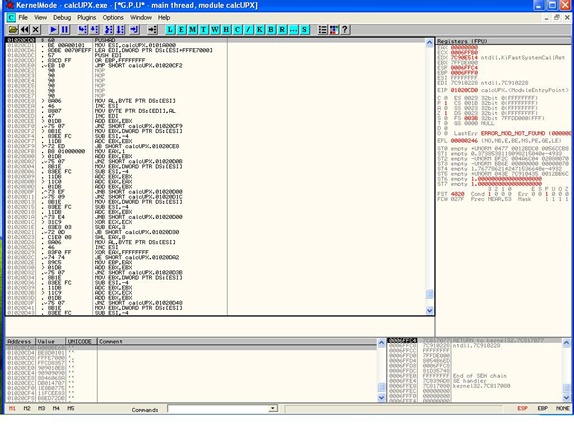
Observing the code we will see the use of PUSHAD and POPAD instructions used. This method is used to preserve the state of the registers and execute packer’s code in the following order:
- save registers (PUSHAD)
- unpack content
- restore registers (POPAD)
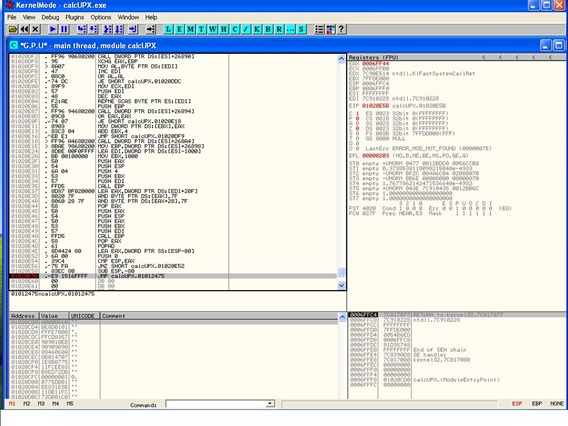
Scrolling down in our code we will find the POPAD instruction and also a JMP instruction in a far location.
Let’s put a breakpoint (F2) on the last jump instruction and run our code until there. This will give us the following results:
- The unpacker code will be executed (unpacking the contents of our file in memory)
- When the unpacker finishes, we’ll hit the breakpoint right before executing the jump to the unpacked code
So far so good.
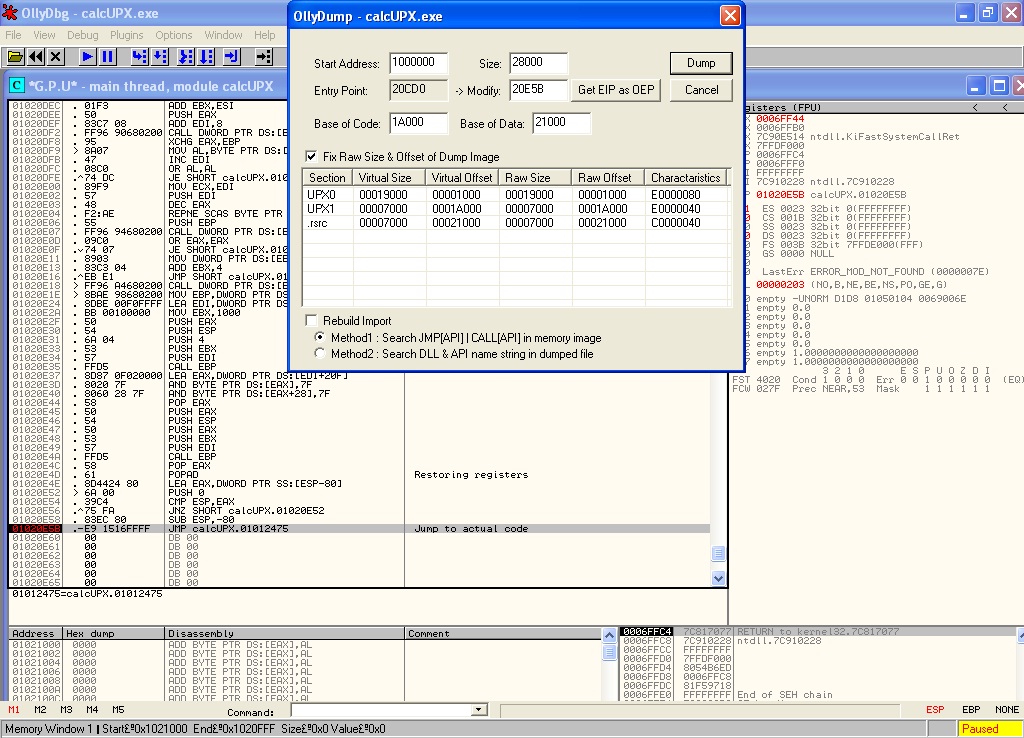
In order to get a copy of the unpacked code in memory, we can simply right click in the ollydbg main window and select “Dump debugged process”
Note : If that option is not available, grab a copy of the plugin OllyDump here : http://www.openrce.org/downloads/details/108/OllyDump. An alternative way would be to use LordPE or PEtools to dump the process.
From the options that will appear, just remove the option Rebuild Import and select Dump,
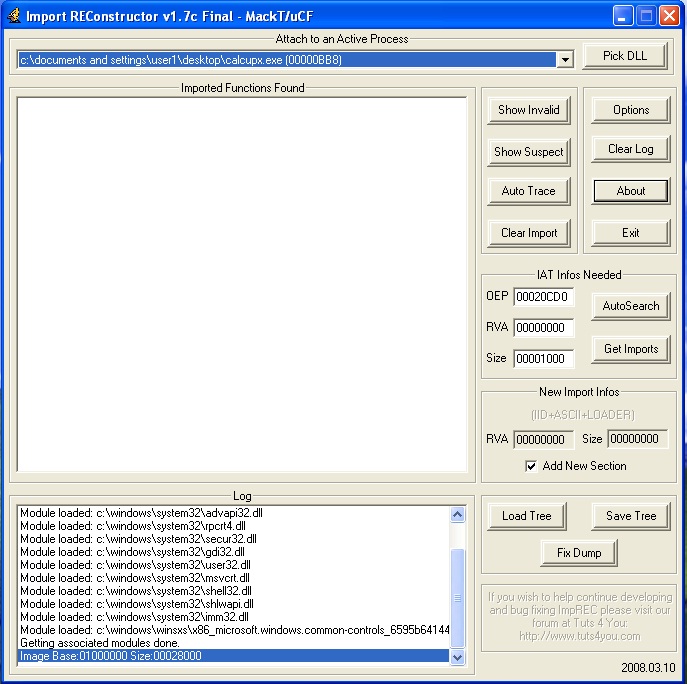
Leave the debugger running and open ImpREC, under ImpREC select the process that we are debugging and attach to it,
If we try to run the executable at this point, based on what we dumped earlier, we will most likely get an error “the application failed to initialize properly”. This is normal, because the IAT table is still bad.
In order to identify the IAT structure, Import Reconstructor needs to know the OEP of our application (of the unpacked code)
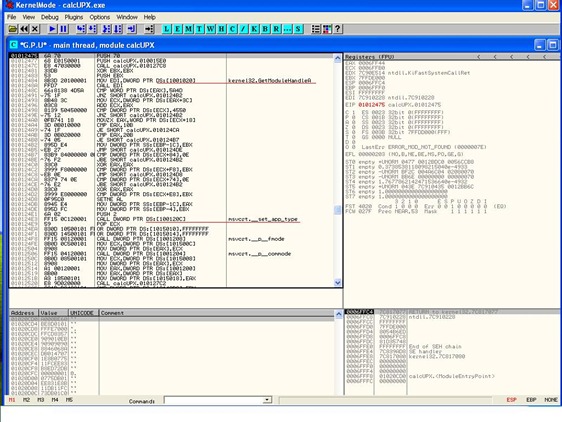
We noticed earlier in Ollydbg that, right at the end of the unpacker routine, there was a jump for a location outside the packer’s code. This location is the OEP of our application.
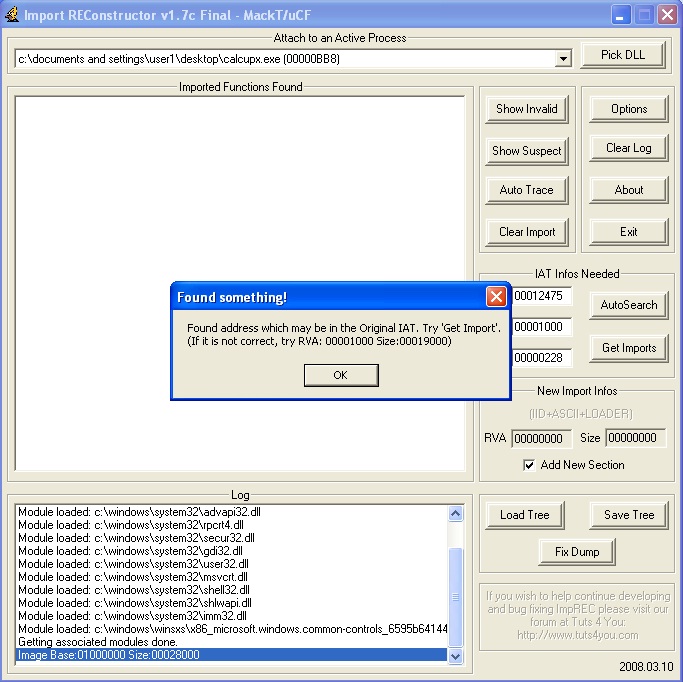
If you take that address (the offset from the base address of the module), example “JMP To Address:01012475 – Image Base:01000000 = 12475” , in the OEP section of the ImpRE, and press AutoSearch, our imported functions will be populated.
Imported functions:
Excellent. The final thing we need to do, is put the reconstructed IAT back into the unpacked binary.
This can be done by selecting the “Fix Dump” option. Choosing our previously dumped file, the program will create a copy of it with the proper IAT table. You can always verify the file by running it. Also back on the debugger, the new created file will have the import table proper listed.
Rebuilding IAT under IDA pro
An interesting approach with IDA pro was presented at Blackhat ‘09 by Jason Raber and Brian Krumheur (“QuietRIATT”).
They demonstrated a plugin they wrote for IDA which allows them to rebuild the Import Address Table using hooked DLL calls.
Unfortunately, today, this tool remains on a “request to have” basis and from what we can know it is not yet a complete replacement for ImpREC that we used earlier.
Using IDA pro is tricky for IAT rebuild. Since I don’t have a copy of QuietRIATT myself, I will demonstrate an alternative way based on a script written by ekse, a member of the Corelan Team. You can download a copy of the script here : http://redmine.corelan.be/projects/ida-scripts (files – ida_patch_import.Py )
The script will take the import table the way it’s generated in Ollydbg and will create the names and xrefs back in IDA.
Start with loading the packed executable in Ollydbg,
Simply run the routine we did earlier on, basically let the unpacker routine run and break at the end of the routine (the jump that would take us to the unpacked code).
At that point, from there, step once (press F8 once). We can now see things in memory that were not visible before, since our application is unpacked at this point, and references to functions are restored.
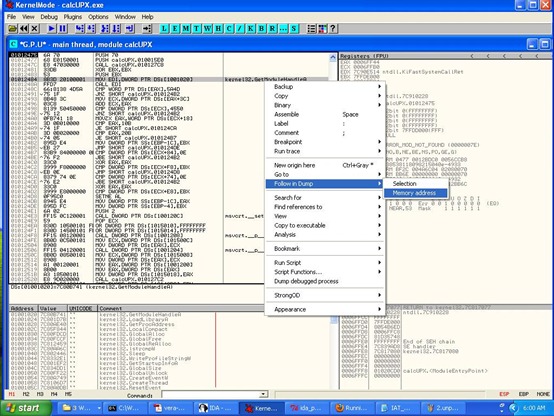
In order to get a dump of the current function state ( an actual IAT reference ) we select the first visible function location and with right click on that instruction, we choose “Follow in dump – > Memory address”.
This should get you all names of the functions properly
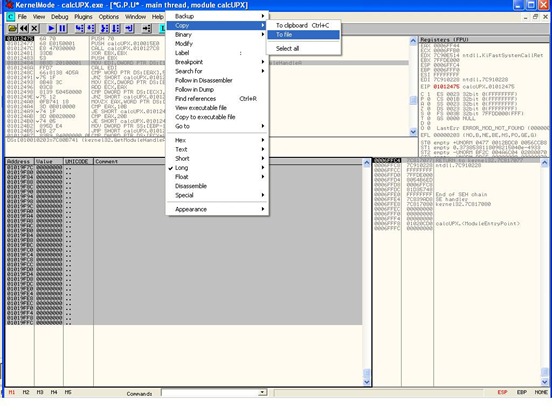
Right click on the section, go to “Copy”, choose “select all” and then “Copy to file”.
Save the table to file.
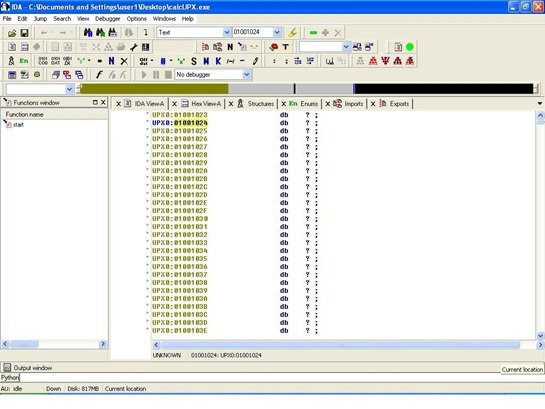
Fire up IDA and open the same packed executable. Obviously, since it’s packed, we’re not going to see any references to functions names .
Simply run the python script:
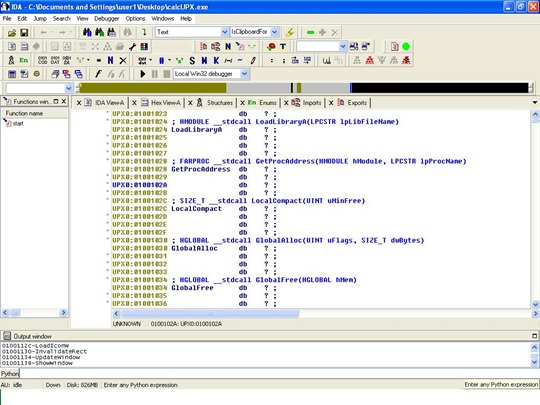
Edit – Plugins – IDA Python – find/select the ida_patch_imports.py file.
Feed it the text file that we created a few moments ago in Ollydbg, and that should restore the IAT in IDA.
Note : if IDA complains about “Can’t rename byte as ‘function name’ because this byte can’t have a name (it’s a tail byte).”, then before running the script, select the first 2 lines in the IDA View, and press “u” (undefine).
Many thanks to corelanc0d3r for his support and tolerance and ekse for the excellent script.
About the author:
Nicolas Krassas is a security researcher and system administrator. Consulting for security firms and ISPs, enjoys spending time reading topics on security, malware reversing and exploit writing.
© 2011 – 2021, Dinos. All rights reserved.

